
Proper Exposure Control
The first in a series of tutorials on mobile photography.
Working on a photo editor for a year means we spend a lot of time staring at pixels and manipulating them. One common pitfall we see photographers falling into repeatedly is proper exposure. The question of proper exposure is well-documented, but hasn’t been adapted to mobile photography before.
We’ll attempt to describe what’s happening on a technical level first, then we’ll dive into how you control it on your iPhone, then dive into some recommendations to make sure you capture the best photo possible, always.
A Quasi-Technical Description of Exposure and Clipping
Before we start, a little bit of terminology is helpful to establish context. Exposure refers to the amount of light that hits the sensor of your camera. Proper Exposure means the bright and the dark areas of the photo both got enough light to distinguish detail. Overexposure means the bright areas in the photo got too much light, and underexposure means the dark areas got too little.

The problem with over and under exposing is that you risk “clipping” your whites or blacks. When they’re clipped, you lose detail; Your sky no longer contains clouds, but is bleached white. To understand what Clipping means and why it happens, you need to have a basic understanding of how your camera sees the world.
This is a simplified analogy of how the sensor works, helpful to establish a mental model. On a modern digital camera sensor, each pixel is represented by three colors: Red, Green, and Blue. Each can be thought of as a bucket. Once your camera is finished filling the buckets, it reads the amount of light in each, and that’s your pixel. Clearly, each bucket has a maximum amount of light it can hold, and once it’s full, it can’t fill up any more. If all three red, green, and blue buckets fill up while the shutter is open, you end up with indistinguishable white, and all the detail in that part of the photo is lost forever. Similarly, if not enough light gets into the buckets, you end up with near-black.
Your camera is really smart and takes care of all of this for you, so you never have to think about it. However, in most photos, you have to make a trade-off between capturing detail in your shadows, and capturing detail in your highlights. It’s a tough decision to make, because you ideally want to capture the full scene, but during most of the day, the brights are very bright, and the shadows can be very dark. If you’ve heard the term “Golden Hour” before or wondered why a lot of photographers post photos of the sunrise and sunset, one of the reasons is because during those times, the sun gets much softer, making the difference between highlights and shadows less stark.
Controlling Exposure on your iPhone
Ok, so with that background, let’s start talking iPhone. The first step to taking a good photo on an iPhone is to wipe your lens. Make sure you don’t have a blanket of dust on it from your pocket, and make sure you don’t have a lot of skin-oil on it causing streaks of light. Wipe it quickly on your shirt or pants, and make sure it’s sparkling clean. This’ll make sure lights in the evening aren’t streaky and your photos don’t look like they’re shot through foggy eyeglasses.
Once you’re in the camera app, iOS takes over exposure for you. It analyzes the stream from the sensor, and if it finds really bright areas (the sky, a white house, or a laptop screen), it automatically adjusts the exposure down, and alternatively, will up the exposure if it finds a lot of really dark areas.
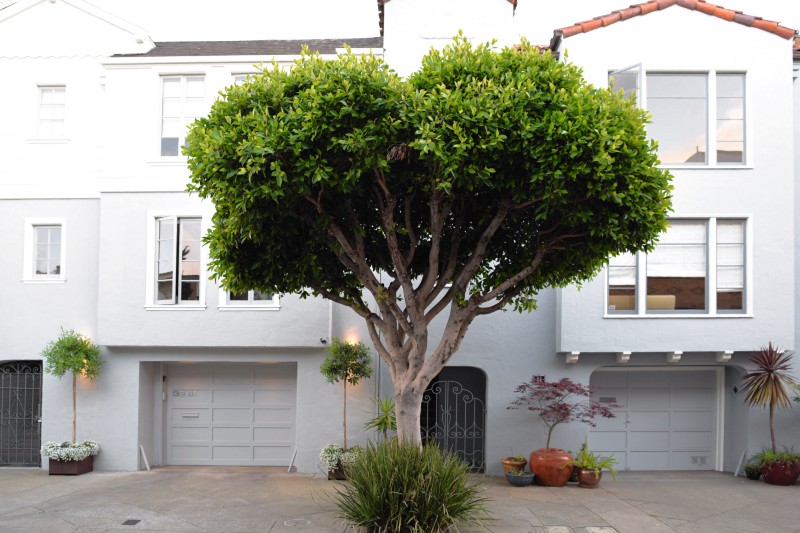
When composing a photograph, you need to have some point of focus: An area in the photo that you want to guide the viewer’s eye towards. That’s the most important part of the photo, and you want to make sure that point is properly exposed and focused. When you tap to focus on that point, you’re also indicating to iOS that you want that area exposed.
What happens if that point is dark? iOS will up the exposure, and your sky might get blown out (become indistinguishably white) in the process. You’ll notice, when you tapped to focus, that a little sun icon showed up next to the focus square. If At this point, you swipe up and down, you’ll control exposure. Up will increase the exposure, and down will decrease it.
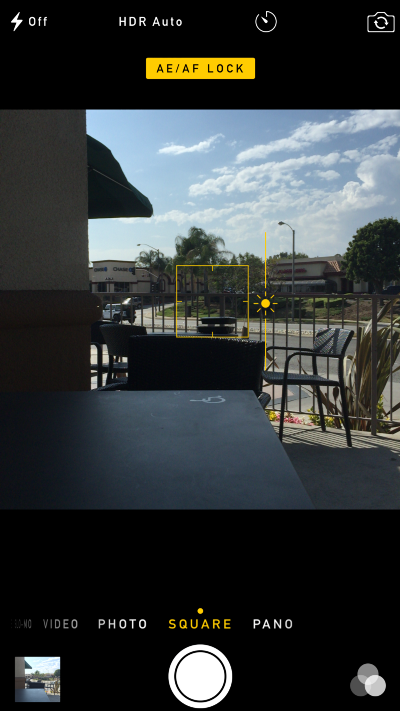
You can play around with this slider, sliding it up to get a better sense of what white clipping is, and sliding down for the opposite. When you move your phone however, or when iOS thinks the object you focused on is outdated, it’ll take over again and try to fix the exposure for you. If you don’t want that to happen, long-press on the point you want to focus, until a yellow pill shows up at the top letting you know that AE/AF Lock is on. AF means Auto-Focus, and AE means Auto-Exposure. You’ve essentially taken over and told iOS that you know what you’re doing.
At this point, you get to make your artistic decision. Are you taking a silhouette of a person against the sky? You’ll want to underexpose aggressively to completely black out the person. Are you taking an indoor shot? You’ll want to properly expose the wood and the walls, and the windows can be blown out, it doesn’t matter. How you make your decision here takes us to our final point –
Is it better to overexpose a photo or underexpose a photo?
The answer, frustrating as it may be, is that it depends. Unless intentionally used for effect, once a region of the photo is clipped, it’s lost forever. iOS doesn’t know whether you want to post-process your photo or not, so it tries to get you a photo you can use as-is. However, if you use a tool like Darkroom, you can get the best of both worlds with some work.
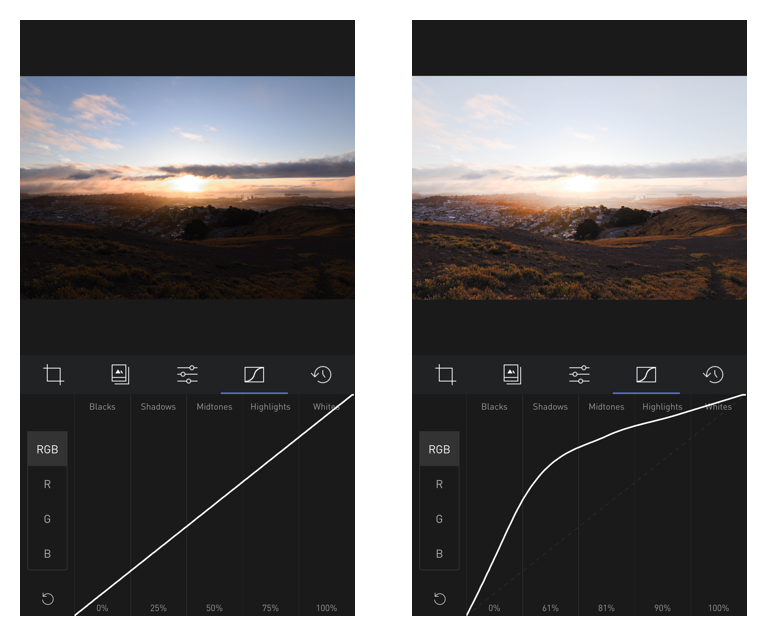
When you tap on an area and lock AE/AF, you can underexpose slightly to make sure the highlights are not clipped, then you can use Curves in Darkroom to counteract the underexposure by pulling up the shadows and midtones. That way, your highlights are maintained, and your point of focus remains properly exposed. You’ll be surprised how much you can boost the exposure of a region of your photo in Darkroom without ruining it.
My personal rule of thumb is: Unless used for effect or style, never clip whites, and worry about it later in Darkroom. It’s easy to clip whites in Darkroom, it’s impossible to unclip them. In my testing, clipping shadows, while easy and prevalent, is much harder than clipping highlights. Getting absolutely no light into your red green and blue buckets is actually really hard, so you always have at least some color that you can bring out. That’s why I err on not overexposing, rather than worry too much about underexposure.
As always, you need to experiment, see what works for you, and adapt as your style and subjects change. I hope this post has given you another tool in your tool belt so the next time you go to take a photo, you can take the perfect photo. It’s quite incredible what these tiny cameras are capable of today.

