Color Grading comes to Darkroom
Today, we’re excited to announce the addition of Color Grading as a new Darkroom+ feature, unlocking opportunities for creative expression that were previously impossible in Darkroom. It's an essential tool to give your photos and videos a distinct style and for making presets. Oh, and it’s also our first new top-level tool since Frames in 2018!
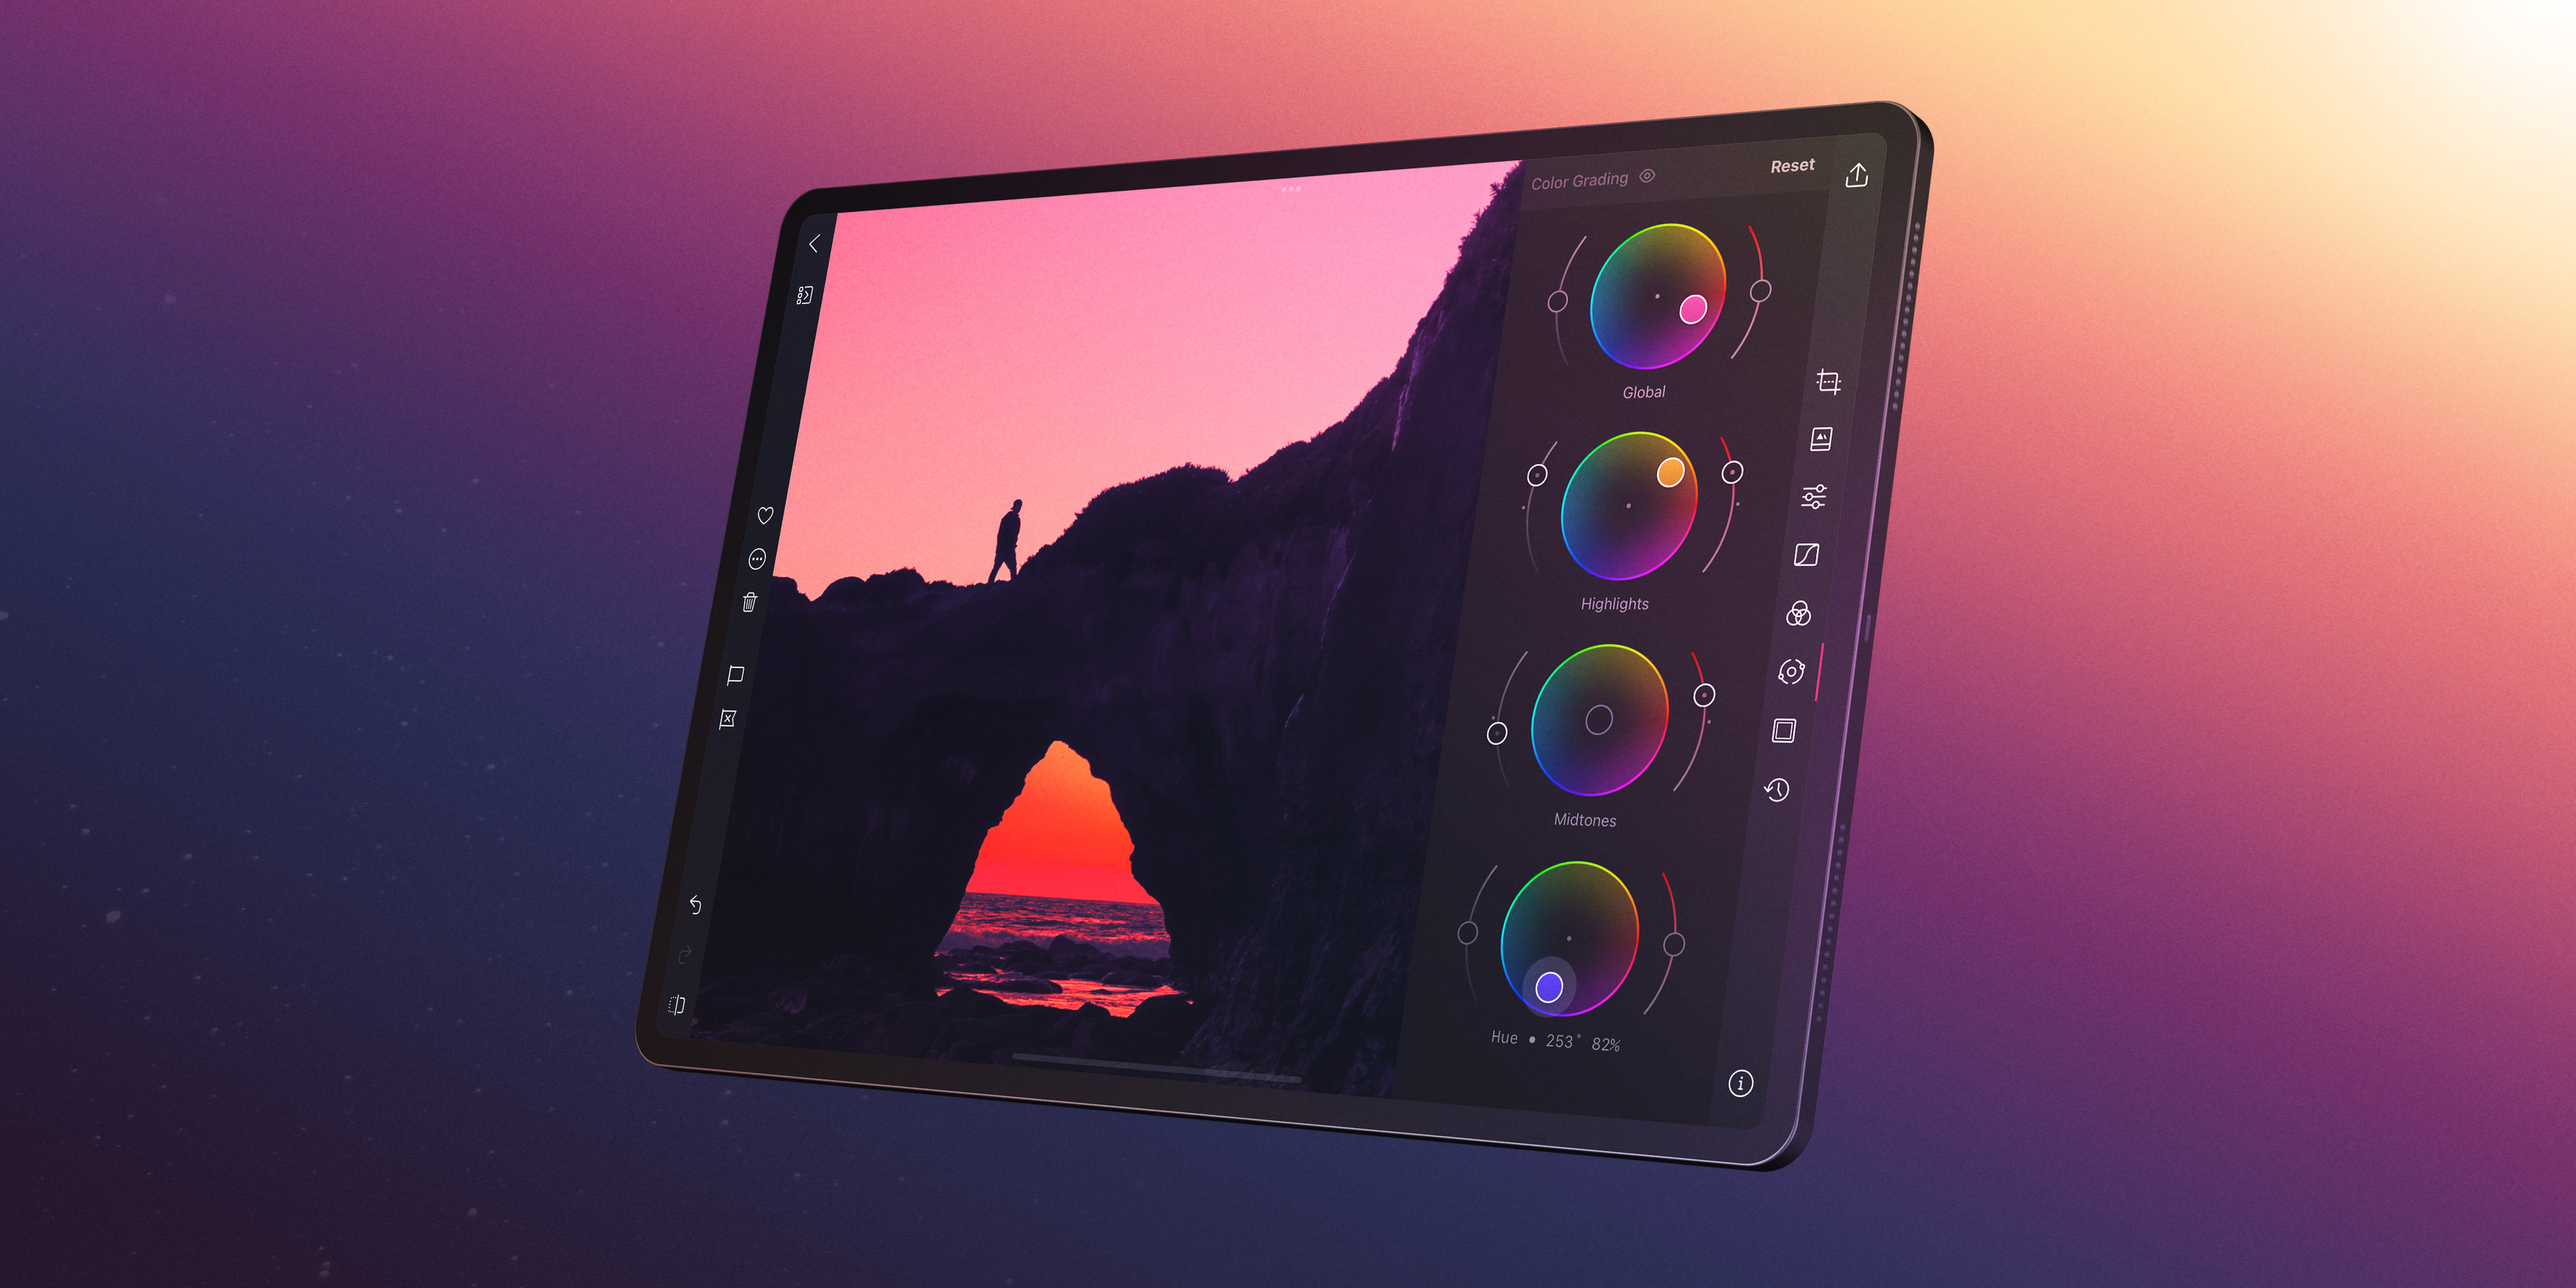
With the four Color Grading wheels, you can now adjust the overall tone of your photo or video by changing the color, saturation, and luminance globally, or in your highlights, midtones, or shadows. It’s remarkable how far you can go in creating unique stylistic looks only using this new Darkroom+ tool.
How Color Grading works
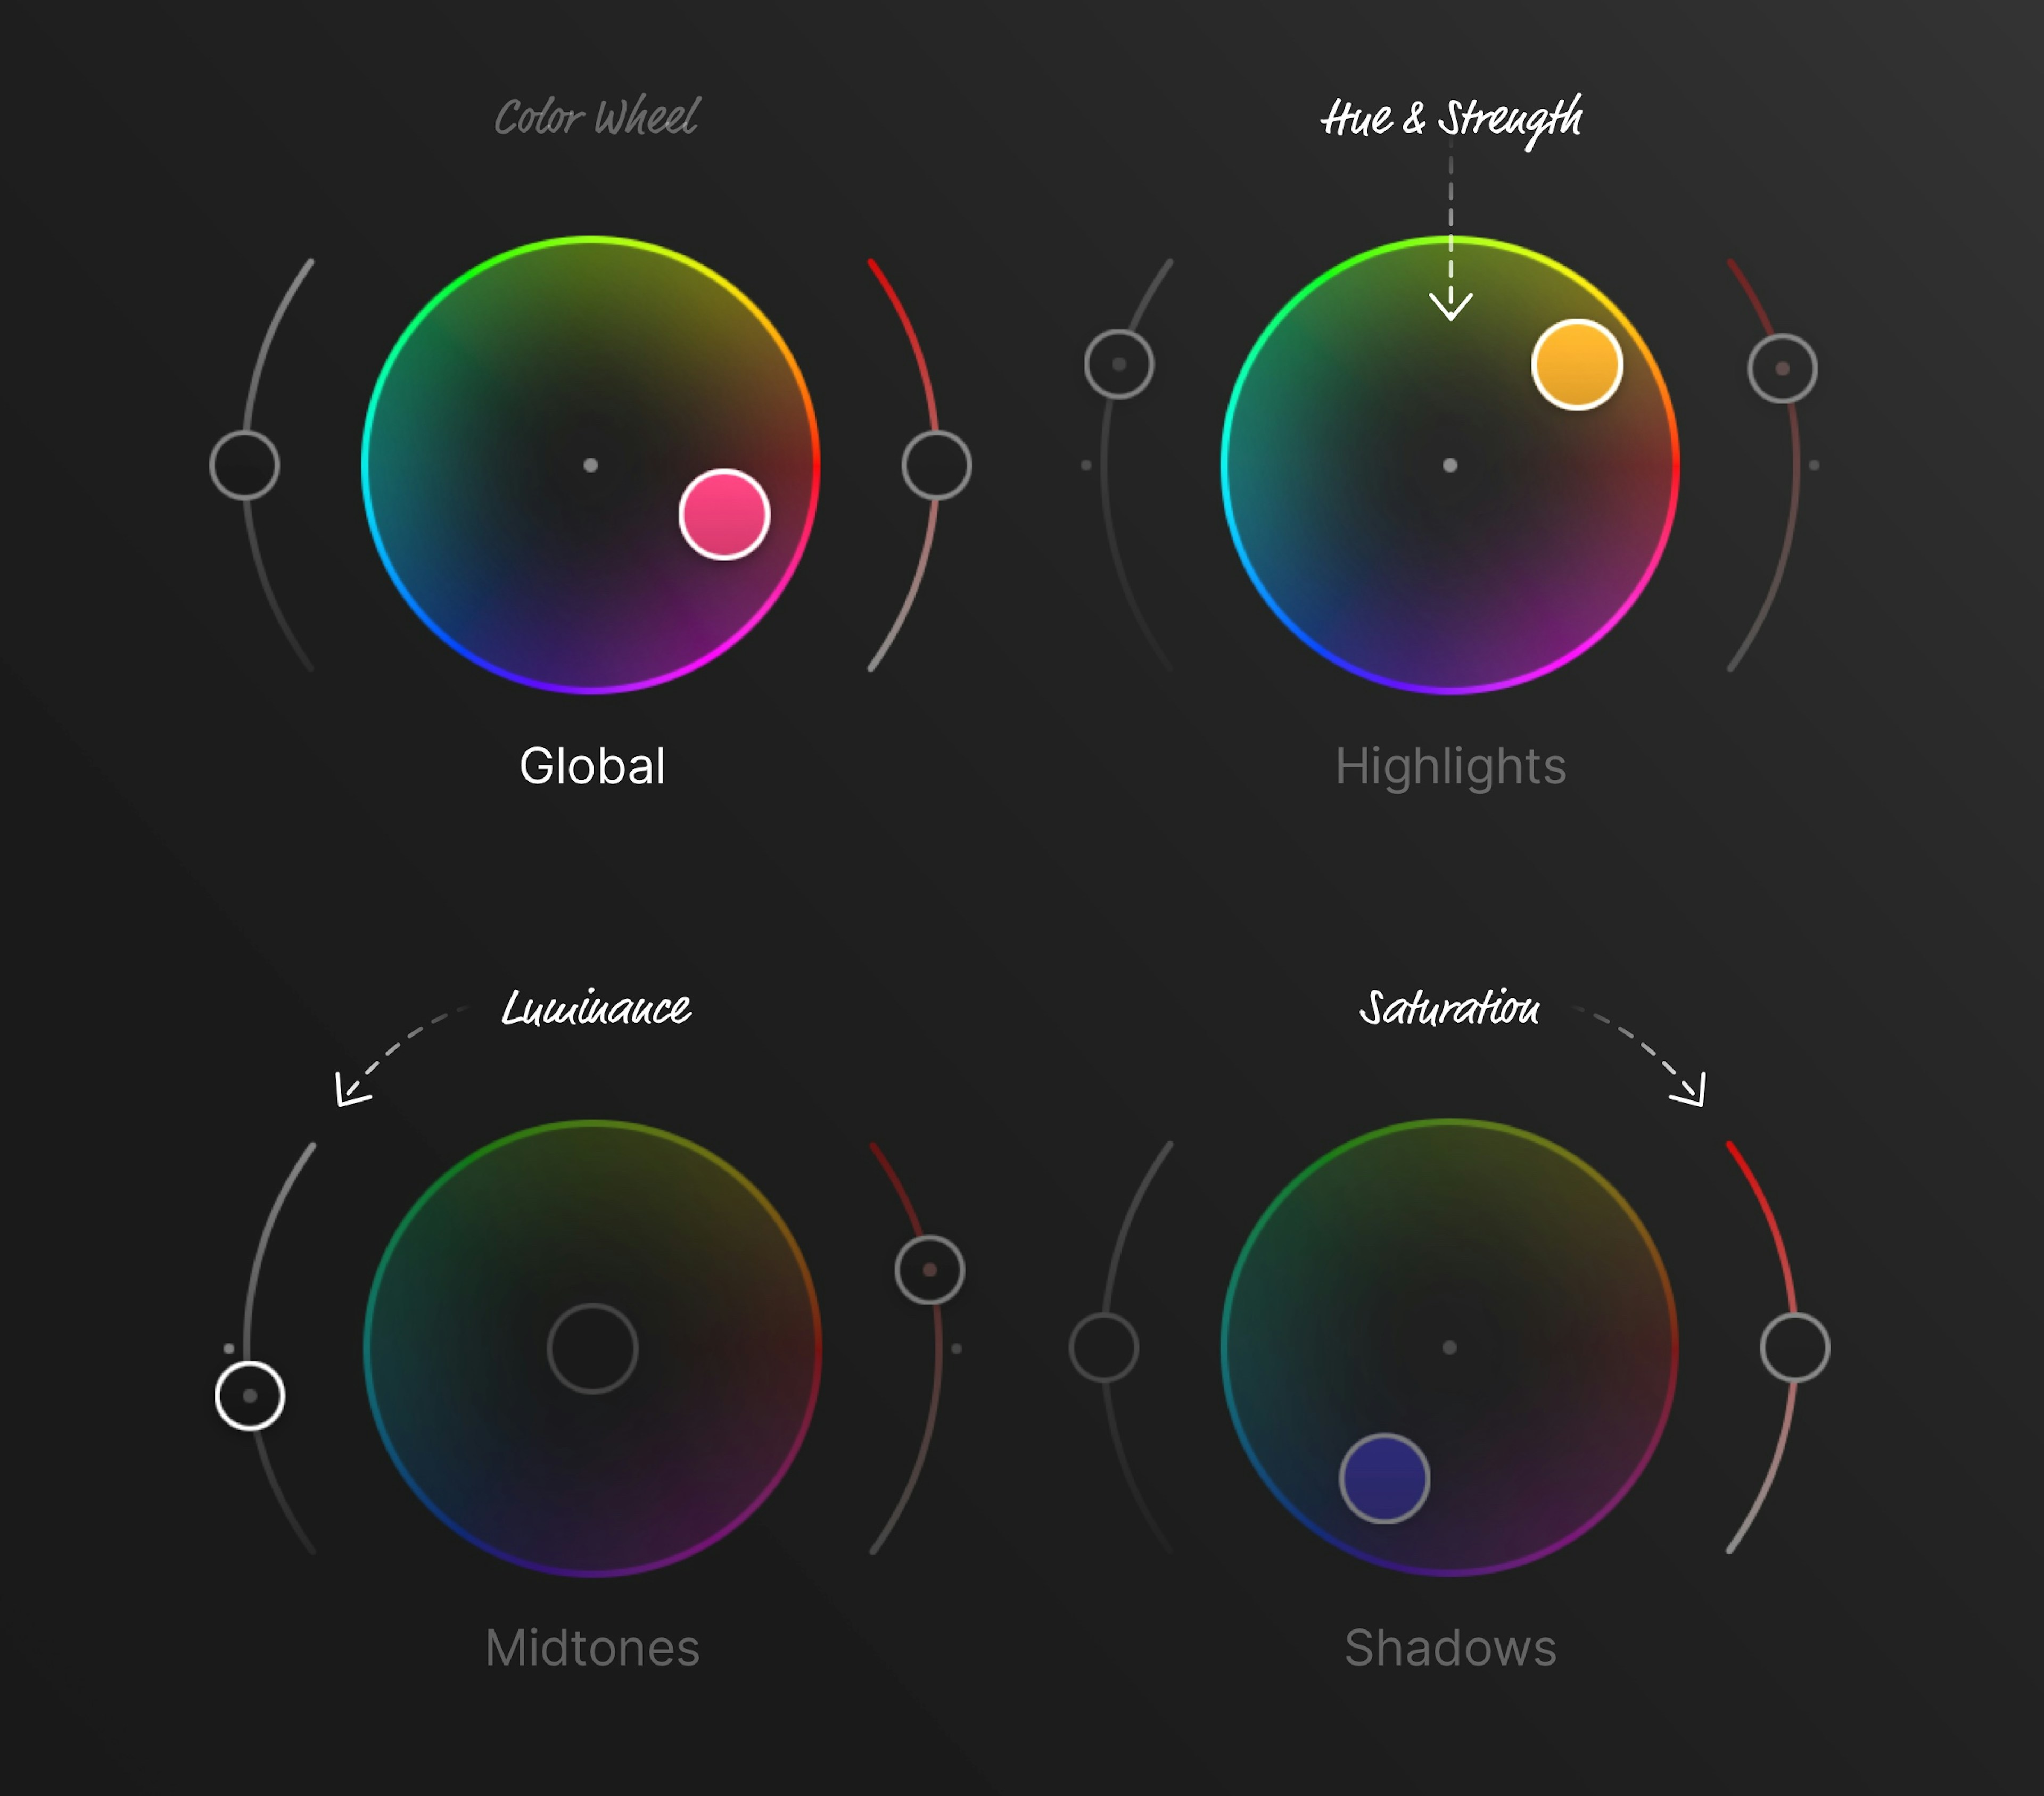
You’ll find four independent wheels in the Color Grading tool. Each wheel affects a specific tonal region of your photo: Global, Highlights, Midtones, or Shadows.
Each grading wheel has a handle in the center to adjust the Hue and Strength of the color adjustment, and two sliders, one on either side, to adjust the Luminance and Saturation in those regions.
Behind the scenes, the Color Grading algorithm adjusts its impact on a per-pixel basis to ensure that the structure of your photo remains the same. In particular, white pixels remain white, and black pixels remain black. Similarly, highly saturated pixels are protected. These constraints apply to all the sliders and wheels in the Color Grading Tool, making it safe to use on photos without introducing unnatural color shifts.
Note: Separating the midtones from highlights and shadows is particularly useful for preserving skin tones, since those are typically only in the midtones, which means you can now easily make your shadows teal and your highlights orange, without affecting the skin tones in the middle!
How to incorporate Color Grading into your editing workflow
You know how sometimes you put on a pair of tinted sunglasses and it makes everything look like the sunset? With the global color wheel, you can essentially do the same thing. If you’re taking a photo of a sunset, you might want to make the overall tones of the photo more purple or red. If you’re taking photos of fall colors, maybe more orange. If you’re taking photos of the sea, maybe blue!
In general, color grading can be used to add a cohesive look to a set of photos, to make a photo pop by emphasizing certain colors, or to correct color imbalances in a photo. It can also be used to create a specific mood or atmosphere in a photo. To get the most out of color grading, it’s important to experiment with the different controls to see the effects of your changes and fine-tune the color grade to achieve the look you want.
Because these adjustments are purely stylistic, we suggest that you perform them at the end of your editing process. First, crop and straighten to get your composition tight. Then, make any lighting corrections, and finally, add any color grading adjustments on top.

Color Grading really shines for making presets
Before this release, if you wanted to shift the colors in a photo, you had to resort to the white balance sliders and individual color and curves edits. This worked, but the process was complicated and indirect. Furthermore, if the photo required a white balance adjustment, it could conflict with the changes in your preset.
Now with the Color Grading tool, you can adjust the brightness, saturation, and hues of your photo all from one convenient place.
If you want your preset to be bright, you can increase the luminance globally. If you wanted the shadows to be desaturated, you can do that with the shadows saturation slider, and if you wanted your hues to be just the right shade of orange, it’s now a single swipe, rather than fiddling with multiple color curves.
By making the process more streamlined, you can focus more on the effects of your presets, not the mechanics of how to achieve that look.
A familiar, new scrolling toolbar
To accommodate the new tool in the toolbar on the iPhone, we made the toolbar scroll. If you are looking for the History Tool, you will likely have to scroll a bit to the right. This does not change anything about the accessibility of Flag & Reject, those action remain accessible by swiping right, or tapping on the small left arrow in the toolbar.
This gives us the space to add more incredible tools in the future as Darkroom matures…
If there’s something you’d like to see in the future please let us know by leaving it on our suggestion board, or by sending us an email or tweet at us. For a full detailed list of all changes please visit our updates page.
As always, we’re very thankful for your continued loyalty and support, and look forward to sharing everything else we have in store for you soon.
The Darkroom Team

