
Hunting Light
This is the third installment of the weekly series exploring photography and post processing. In the previous lessons, we discussed Exposure and Composition.
By now, you should understand how to compose your photos, and how to properly expose them so that you don’t end up with clipped highlights or shadows. By learning how to see, read, and incorporate light into your photos, you’ll have all the technical fundamentals of photography covered.
Understanding where it comes from, how it affects your photo, and how to manipulate it to your advantage is what differentiates a casual photo from an intentional, beautiful photo. As always, we’ll begin with a slightly technical introduction to establish context and frame the topic, then we’ll delve into how to use it.
Another Quasi-Technical Introduction to Light in Photography
Your camera’s sensor is a grid of tiny buckets of light. Light travels as a wave, and its wavelength determines its color. Thankfully, throngs of engineers have — and continue to — optimize sensors to extract the more correct color, more nuanced gradations of light, and to do it with better optics and performance so you don’t have to worry about it. Yet understanding what the variables that impact Light are and how they affect light is how you learn to control it to your benefit.
The details of how camera sensors differentiate color and light off of photos is a fascinating topic, and may eventually be one we tackle, but understanding that photography at the end of the day is taming the wild beast of Light will suffice.
Light gets emitted from a source, either the Sun, or a flashlight. For simplicity, let’s talk about a flashlight. The bulb emits light that is very concentrated, and diffuses (spreads apart) very quickly. As it hits a surfaces, it further diffuses as it travels in other directions. Light that is bounced off a surface is called Bounced Light.
The relationship that matters to you as a photographer is that dense light is very bright and harsh, and diffused, bounced light is spread out and soft. Neither is better than the other, but they have an extremely dramatic impact on the photo, how it looks, what story it tells, and what it draws attention to.
Contrast
In common english, Contrast is defined as:
contrast
noun |ˈkänˌtrast|
the state of being strikingly different from something else, typically something in juxtaposition or close association
In photography, it can be restated as the range of brightness between the light and dark areas of the photo. This isn’t a canonical description of contrast in photography, but it serves our purposes here.
If you take a photo on a foggy day, the fog adds an even, gray cast that pulls up the shadows and brings down the highlights, and you end up with a low-contrast photo. At noon on a clear and sunny day, the bright areas of your scene bounce a massive amount of light from the sun, and the shadows are completely hidden, bouncing almost no light, and you end up with a very high-contrast photo.
As I’ve always said, there isn’t a “Correct” contrast that you should aim for always since it’s so dependent on the story you want to tell and the style you’re going after. However, unless you intentionally want to avoid it, ensuring that the darkest points of your photo are near-black, and the brightest parts of your photo are near-white will give your photo the widest tonal range possible, without clipping.
Increasing the tonal range means everything in between the brightest point and the darkest point gets as much gradation as possible. This is important because when subtle differences in tone are squished in a small range, they become indistinguishable (like clouds in the sky). The bigger the range, the more differentiation is possible.
Apart from controlling when you shoot and in what conditions, one way you can ensure you’re capturing as much detail as possible is by using the trick we described at the end of our first post: Proper Exposure Control. Keep knocking exposure down until you make sure your whites are not being clipped (another concept described in that post), and you’ll ensure you’re capturing the range.
Portraits
Portraits can be one of the most fulfilling subjects to photograph. People generally love having their photograph taken, and to provide people with a beautiful representation of themselves is itself a thrill for the photographer.
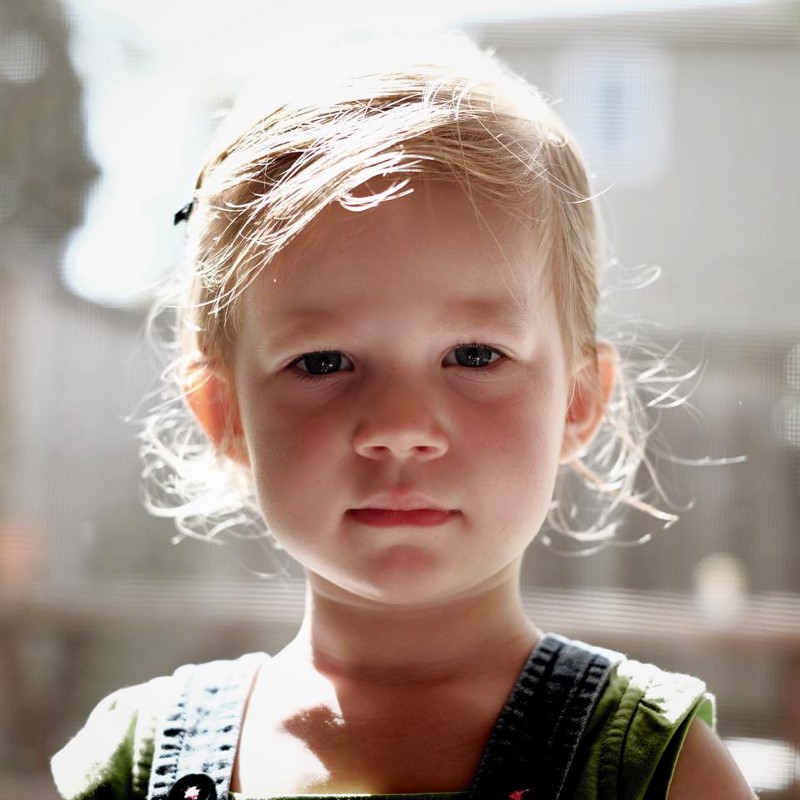
The human eye is incredible sensitive to subtleties of the face. It’s what allows us to tell each other apart from slight changes in the facial shape and structure. In portrait photography, light is how you sculpt the face. Light is what distinguishes the nose from the cheeks, the forehead’s wrinkles from the eyebrows.
A portrait at noon on a hike is not a very please portrait. For one, the light source is directly above, which casts the shadows of the eyebrows down on the eyes. The nose also casts its shadow down on the mouth, elongating it, and the skin oils on the face shine in the sun’s light.
In a traditional portrait, the light typically shines at 45˚ from the side, primarily lighting one side of the face, and the reflected light illuminating the other. Shooting outside, this typically means you’ll have to get your shots within an hour of sunset, or an hour within sunrise. Indoor, you have more options. Let’s dig into both.
Golden Hour
You might’ve heard this term thrown around between your photographer friends. The Golden Hour is actually two hours: The hour after sunrise, and the hour after sunset. During those times, due to the angle of the sun to the photographer’s location on Earth, less light makes it through which softens it, and the light spends much more time in the atmosphere, which absorbs more blue light than normal and yellow/golden light is left.
Use Google to find out when the Sunrise and the Sunset are in your area, and seek it out. Look for a high place with a long view. The longer the view, the more extreme the effect. Ideally, clouds in the sky will capture the light before the Sun actually rises, and the intensity of the color is at its highest.
Portraits and landscapes at these hours are incredible displays of light. Mountains cast shadows, people cast long shadows, and portraits are especially beautiful. Play around with the light, try pointing the camera directly towards the sun.

Bounced Light
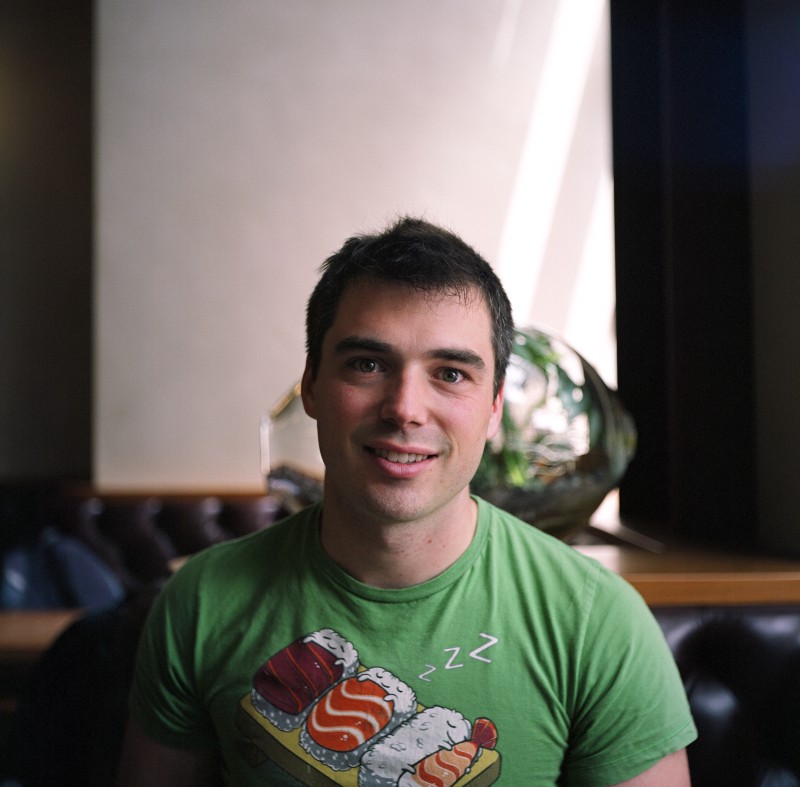
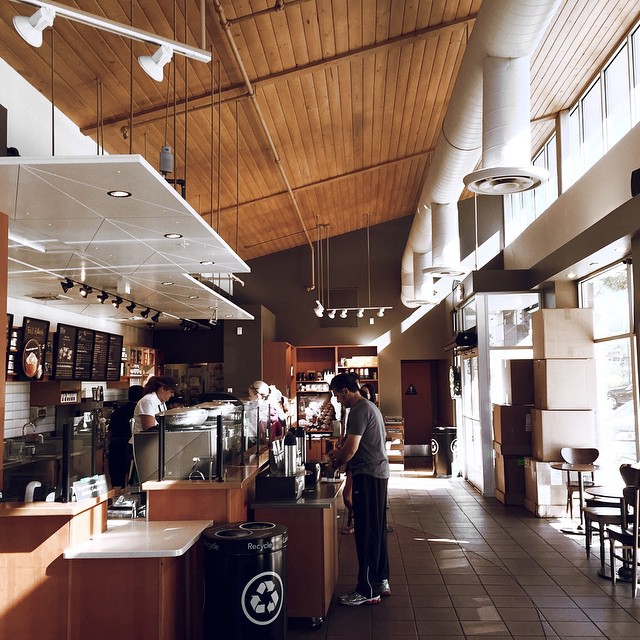
Light, as we said, bounces off reflective surfaces. The more it bounces, the more it’s diffused, and the softer it is. For example, in an urban environment, two people in a coffeeshop with a window to their left will have the sun reflected off the buildings and the environment around, and through the window, casting a soft light to the environment. The softness of the light allows you to bring up the shadows without clipping the whites, increasing the range of what the sensor can capture.
Look for large windows in open indoor spaces, wait for the sun’s light to get bounced in, rather than shine directly in, and try taking portraits sideways to the window. You’ll be amazed how good soft, bounced light can make a portrait.
Harsh Light
On a closing note, I wanted to talk about harsh light. This is in contrast (hah!) to what I’ve been talking about for a few sections, but I thought it was important to reiterate there isn’t “one true way” or “correct” way to photograph and use light.
Harsh light is distinguished from soft light in two aspects: Its intensity, and how diffused it is. Like we said earlier, light diffuses quickly. If you bring your subject closer to the source of the light, more of it is closer together, and you have harsh light. You can simulate this by passing light through a small opening: A crack in the ceiling, a small window, a flashlight. You can use harsh light to add drama to your scene, and you when you combine it with underexposure, you can really focus the viewers attention to a single subject. Browse around Instagram on the #chasingharshlight for some inspiration.
As always, have fun with it!

