Ten Productivity Tips & Tricks for Your Darkroom Workflow #2
Following up last year’s surprisingly popular 10 things you likely didn’t know about Darkroom and your many requests for more tips, we put together a second edition that focuses on workflows in Darkroom. Whether you’re new or a pro, we are sure there’ll be something that will help you do more, in less time.
1. Copy & Paste your Edits in Batch
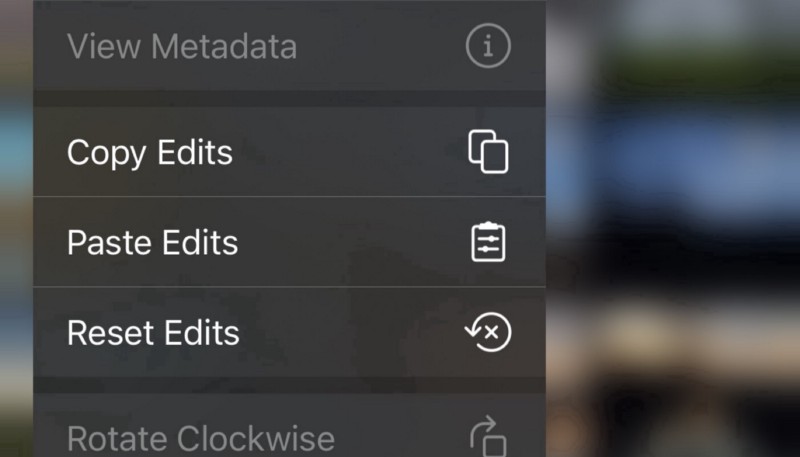
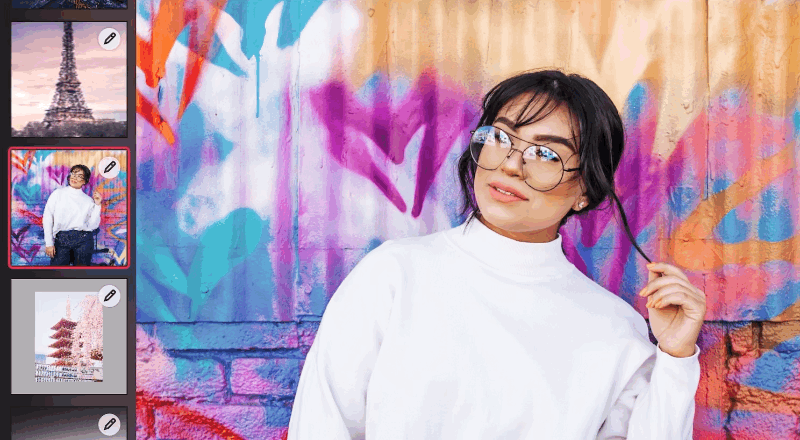
Have a photo or video that just has the best edits or the perfectly picked filter, and want your other shots to look the same? Skip the hassles of re-applying each edit over and over again by copying your edits from the tap-and-hold library menu, History tool, or the Actions (…) menu. Go to your other photos, and paste your edits onto them. This also works in the photo grid where you can select lots of photos and paste at once, so you can process many photos and videos rapidly.
Bonus Tip: if you often end up making the same kinds of edits, make it a filter, read how in tip #3 from our first installment !
2. Tap-and-hold on Live Photo badge for playback
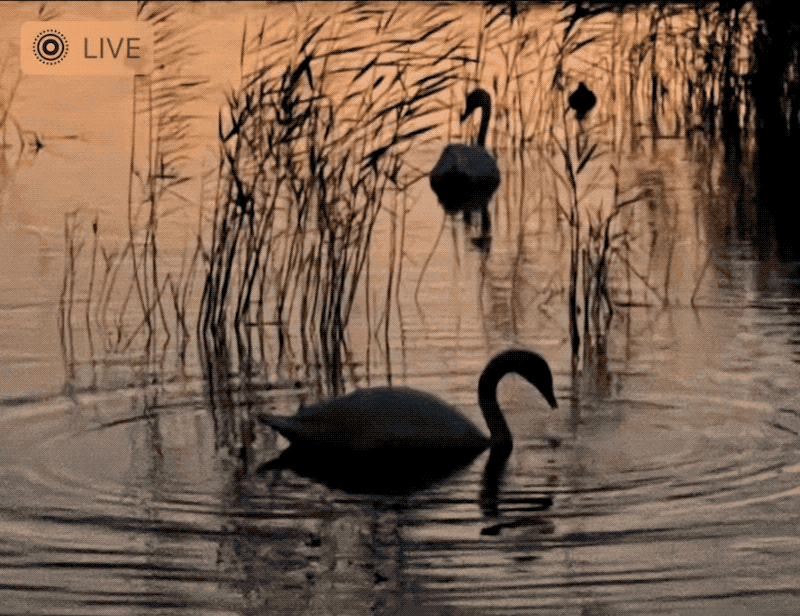
The joy of seeing your wonderful shot in motion is why we love Live Photos so much, and why we fully support editing and exporting them! While editing, Tap the “LIVE” button at the left top when viewing a Live Photo. Darkroom will process and play back your Live Video with all it’s edits applied. Bringing life to your favorite moments is pretty magical. When you export using “Modify Original”, the live photo will keep its edited video!
3. Turn your iPhone to landscape for an iPad like editing experience
When we designed and built our iPad interface, we made sure it would also work well on your iPhone in landscape orientation. For those with the larger iPhones, this brings some of our iPad exclusive functionality to iPhone. In the library grid we show the Library Sidebar, when viewing or editing we can show the Photo Strip, and when editing in the color tool we show our Color Histogram. It makes reviewing collections of photos super fast.
4. Photostrip: manage while editing
Having to constantly switch between the library and the editing interface as you navigate your library slows you down and takes you out of flow. With the photo strip available on all devices in landscape orientation, you can skip & hop through your library while editing, or quickly compare multiple photos to find the one with the perfect expression or the perfect light.
Most importantly, you have full access to the Photo Actions menu by long-pressing on a photo in the Photo Strip (or right-clicking using a mouse), meaning you can do complex library management and copy & pasting right from within a single editing session. Zoom zoom zoom!
5. Tap for precise adjustments on slider tracks
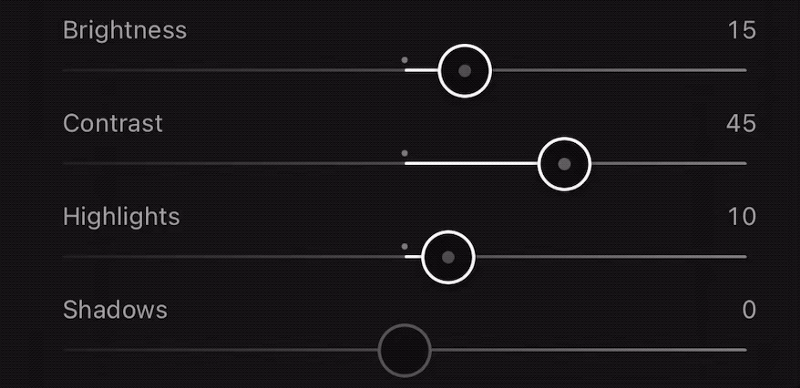
Sliders are great to quickly make a broad stroke adjustment. But there are times when you want to accurately make fine adjustments, but sliding with your finger and letting go at the right time can be pretty tricky. That’s why, on any slider or curves track, you can tap on the slider track adjacent to the knob to have the value increase or decrease with steps of 1. It doesn’t get more precise than that.
6. Rotate from Library
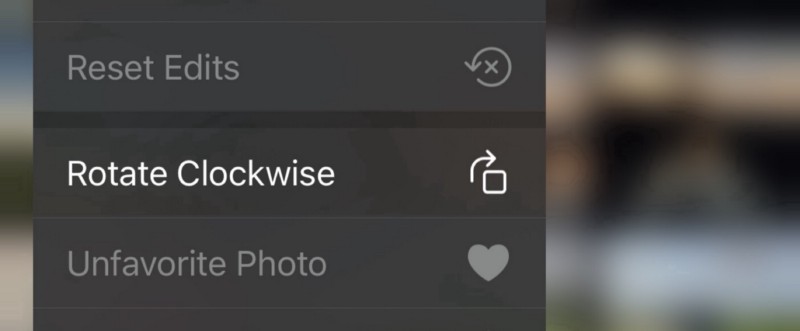
Making frequent operations ultra fast is what Darkroom is all about. Take Rotate Clockwise for instance. Available through our library context menu which you can access by tap-and-holding a photo in the library, or our Batch actions you can quickly rotate any (set) of photos without having to go through the more lengthy process of doing this in our Transform tool. And on iPad and Mac, you could even use our “command + r” keyboard shortcut.
7. Frame for Stories
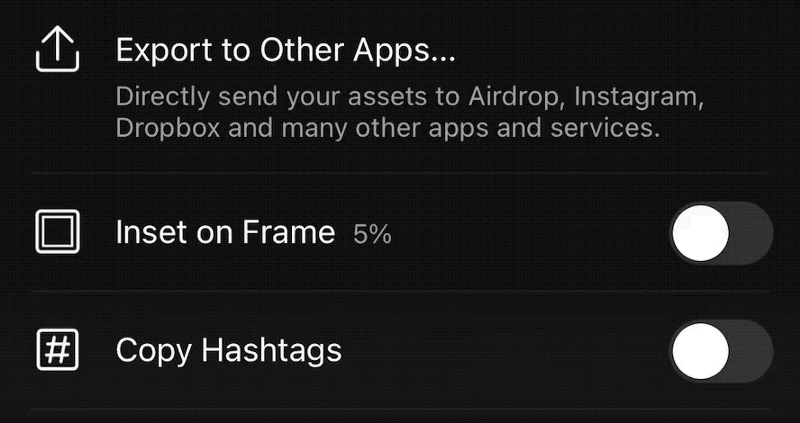
Instagram & Snapchat Stories have a 9:16 aspect ratio, but your photos don’t. If you’re intended destination for your photos is Stories, we introduced a specific tool called Frames to make sharing to Stories even easier. Not only do we have the dedicated Frames tool with smart colors, we also have a quick option in Export for you to inset your photo on a story-sized frame, which even works when exporting multiple photos and videos at once!
8. Backup & Restore Filters
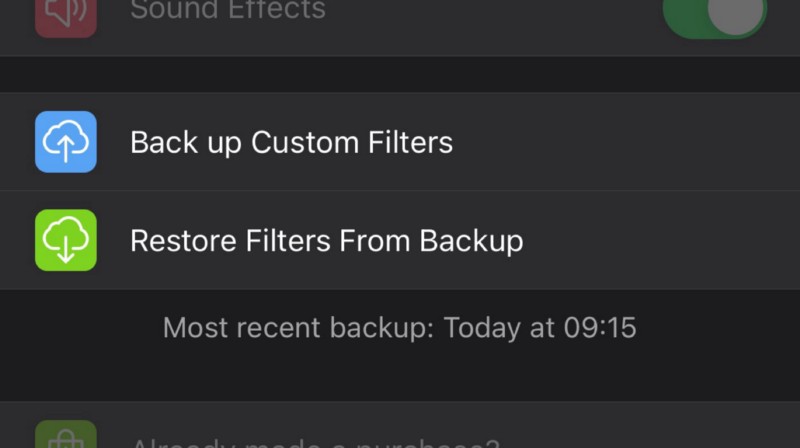
Hidden in our settings is the option for you to manually backup and restore your custom filters to iCloud. Besides enabling you to safe keep your own carefully created filter creations, this also enables you to have your filters available on your other devices (iPad or Mac) as long as you use the same App Store account!
9. Modify Original to sync edits across your devices
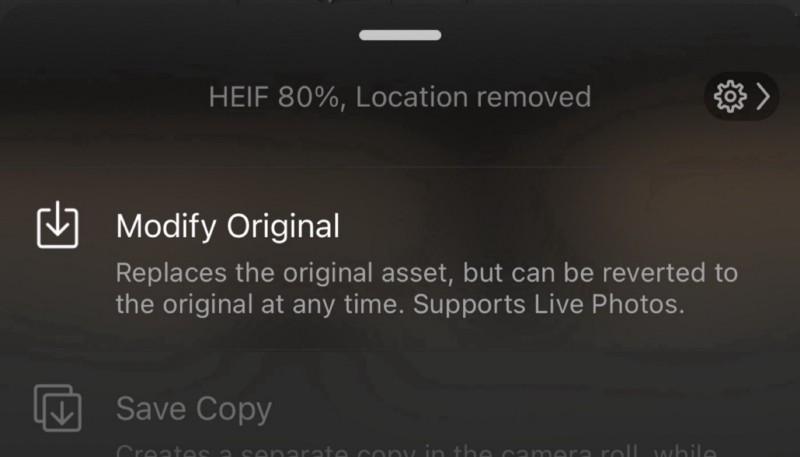
With the recent release of our Mac app, people have asked us to add the ability for edits to be synced across devices. We love the idea, but to do it right will take us time. Until then, we have a useful workaround that helps you move your edits across devices. When you export a photo using the “Modify Original” option we not only save a new image nondestructively with the original, but also save your edits! When iCloud Photo Library syncs your images, we can recreate those edit on your other devices. Ta-da!
Note: This only works if your photo has never been edited on the other devices. We do not override/merge existing edits.
10. Filter strength
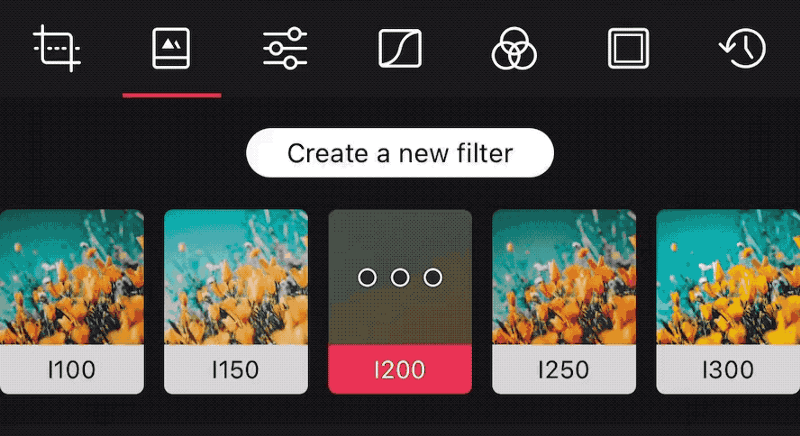
Last but not least, when you select a filter, you can tap on the the big dots ••• that then shows the filter actions. This is where you can adjust the strength of a filter using strength slider, you’ll be able to see that adjustment in the filter at all times, and you can copy/paste edits preserving the strength adjustment, and even save it to make your own filter with a custom strength!

