
Ten Productivity Tips & Tricks for Your Darkroom Workflow #3
Over the past year we launched a large suite of new functionality and in this post we are shining a light on some of the big little details you might have missed. Whether you’re new or a pro, we are sure there’ll be something that will help you get more out of Darkroom, in less time.
1. Present your photos on a big screen

Did you know that you can connect your iPhone or iPad to a TV or display, either wired or wireless using AirPlay, to show off your photos on the big screen? We even support device landscape orientation, and allow you to tap the screen when viewing/editing a photo to hide the apps interface for a fully uncluttered immersive presentation.
2. Control which edits you want to copy & paste
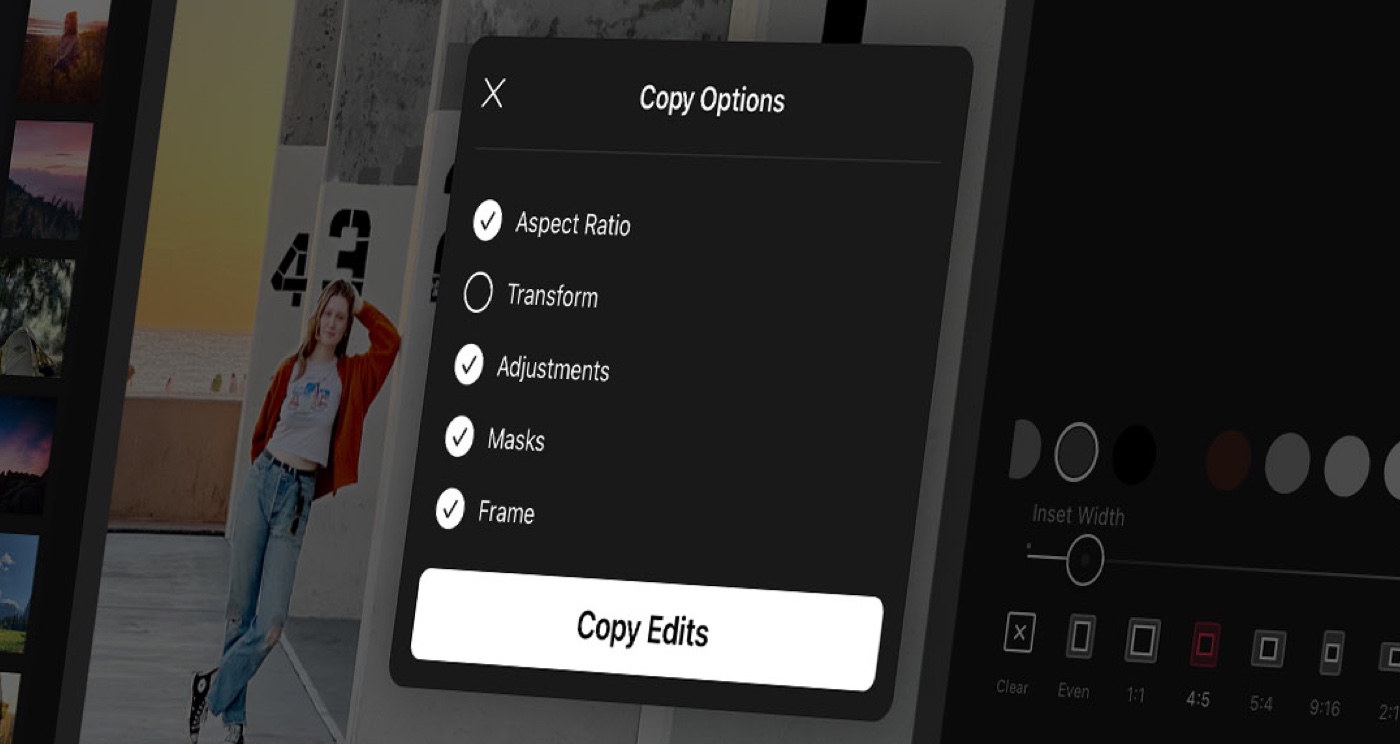
By default when you copy edits we only copy your base adjustments (applied preset, adjustment sliders, color and curve edits). We also have the ability for you to explicitly control which edits (aspect ratio, transform, adjustments, masks, frame) you want to copy and paste. This allows you to only copy a frame and its color, only the crop aspect ratio, just the edits, or any combination. Giving you even more powerful control over the consistency of your shoot in your Batch workflow.
3. Automate your workflow with Shortcuts
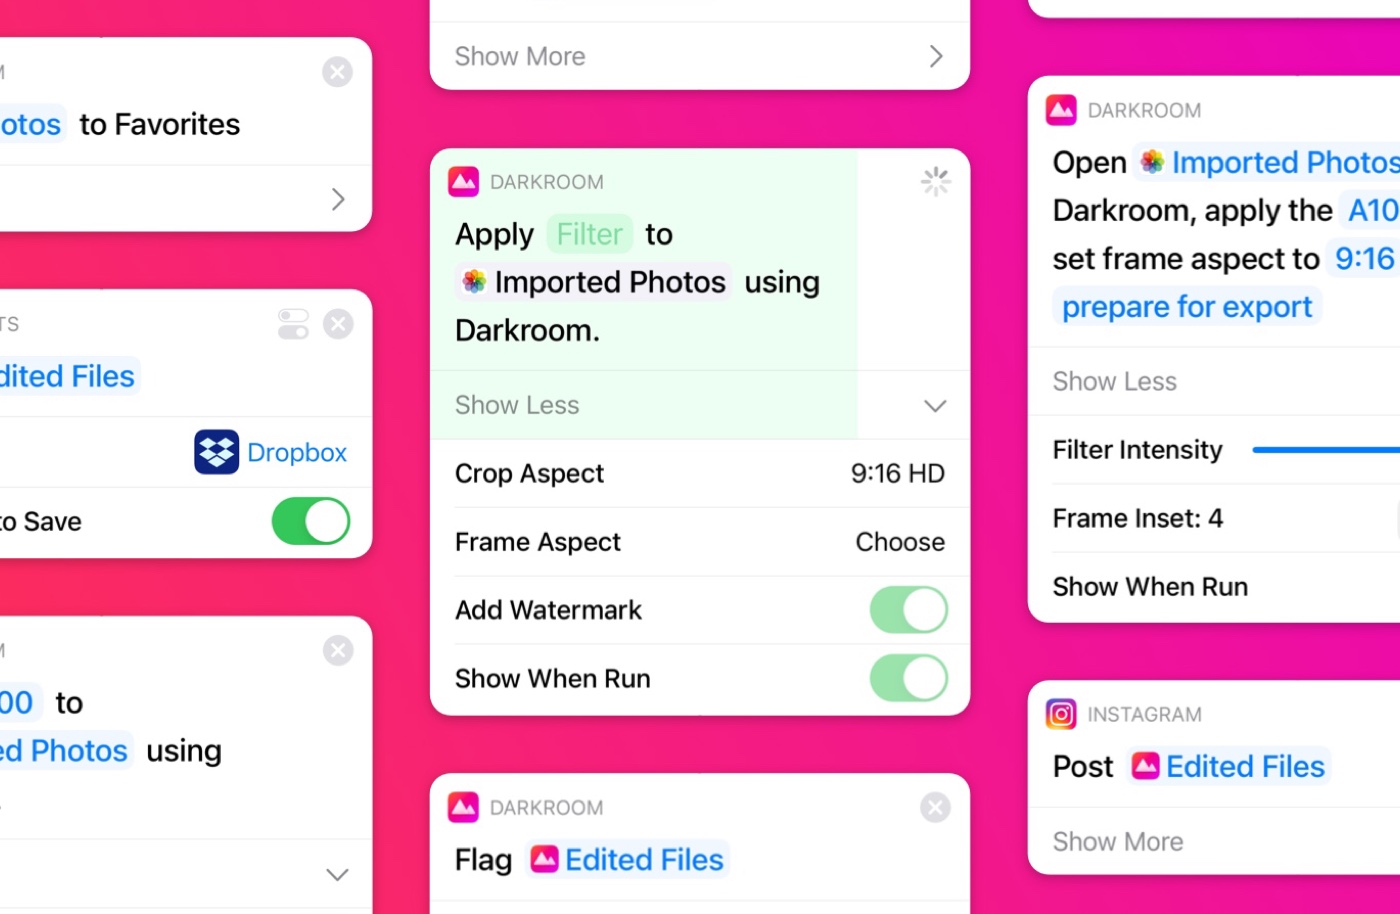
Our Darkroom Shortcut Actions, for the Apple Shortcuts app, enable you to take photos as an input, edit them, and save them to your library or pass them along to another action. You will be able to add a preset, set the preset intensity, inset on a frame, crop to an aspect preset, and add your watermark to every photo or video processed. From there, you can save it out to a Files folder, upload to Instagram, you name it. Learn More →
4. Duplicate a Mask
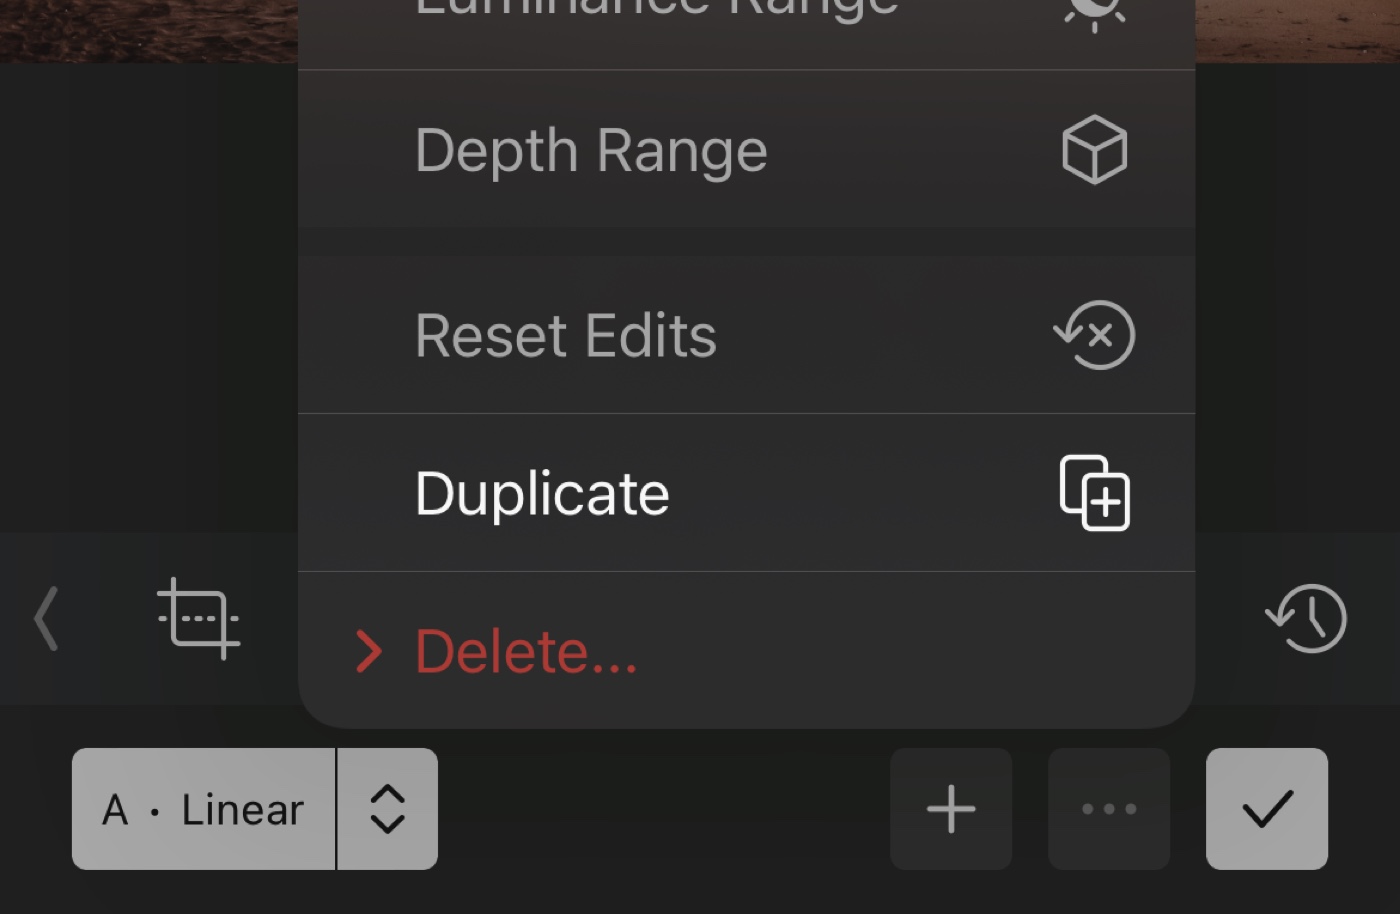
Say you have a Radial mask precisely positioned and set, and you want to use that exact same mask but also want some edits on the inversion of it, but without having to try and manually match it — you can! In the mask options menu found by tapping the [•••] button in the Masks bar, when a mask is active, you will find a “Duplicate Mask” option, just like you will find the “Invert” option there for a Radial mask.
5. Combine Masks
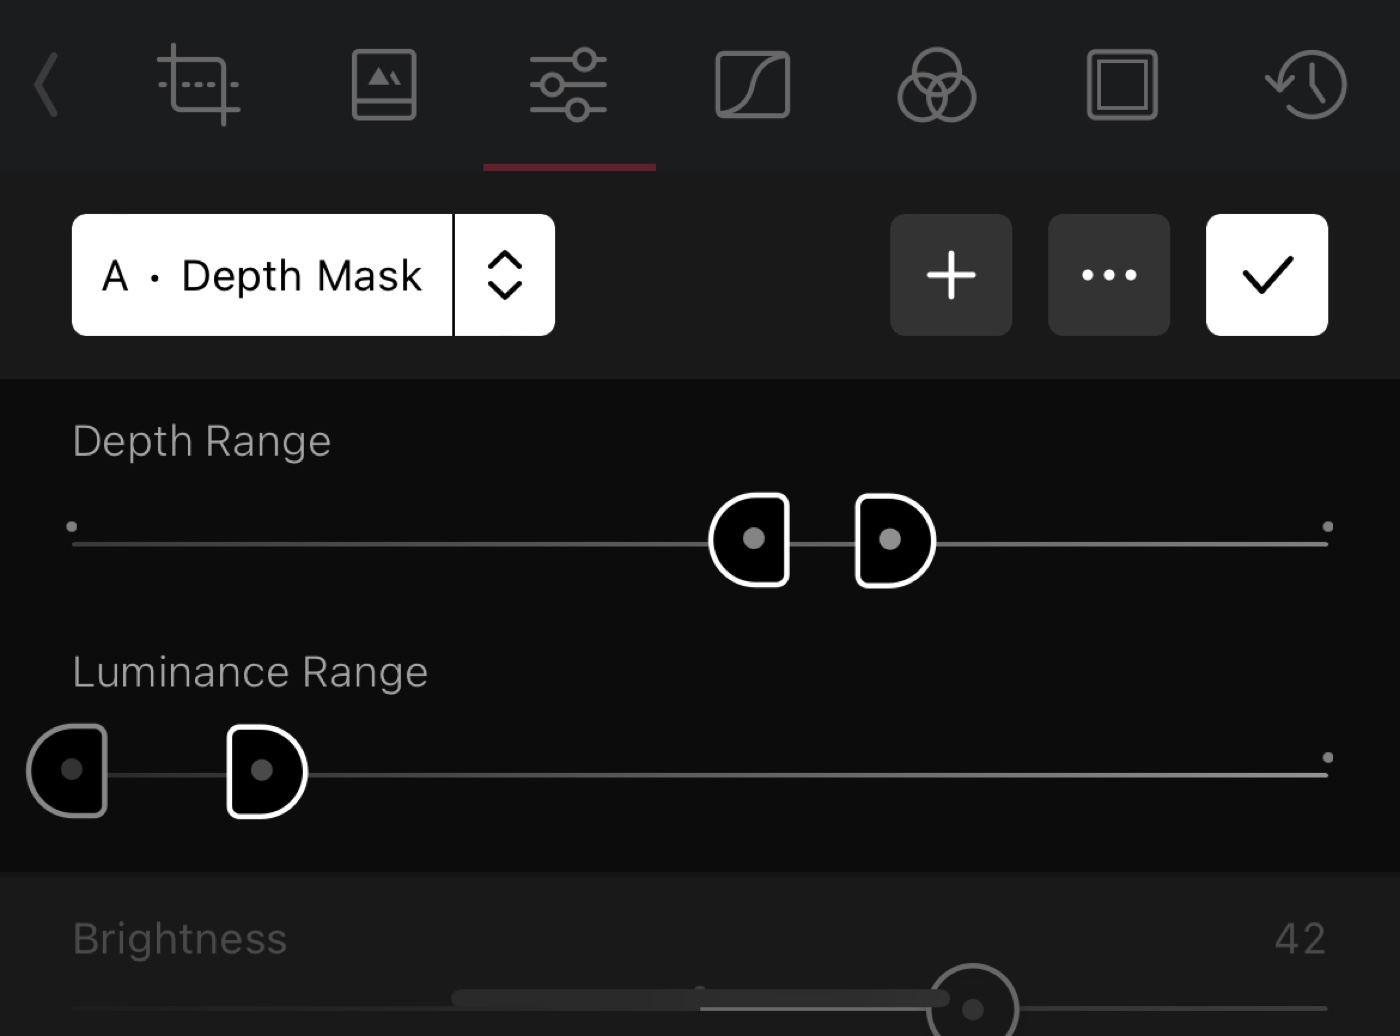
When you add any mask, you can combine that with our range masks to create much more precise selections. It enables you to for example select only the blue sky and not the blue water by combining a linear mask with a color range mask. Or by enabling you to only select the lighter greens in a landscape photo, by combining a color range mask with a luminance range mask.
6. Change the Frame inset size of the frame export option
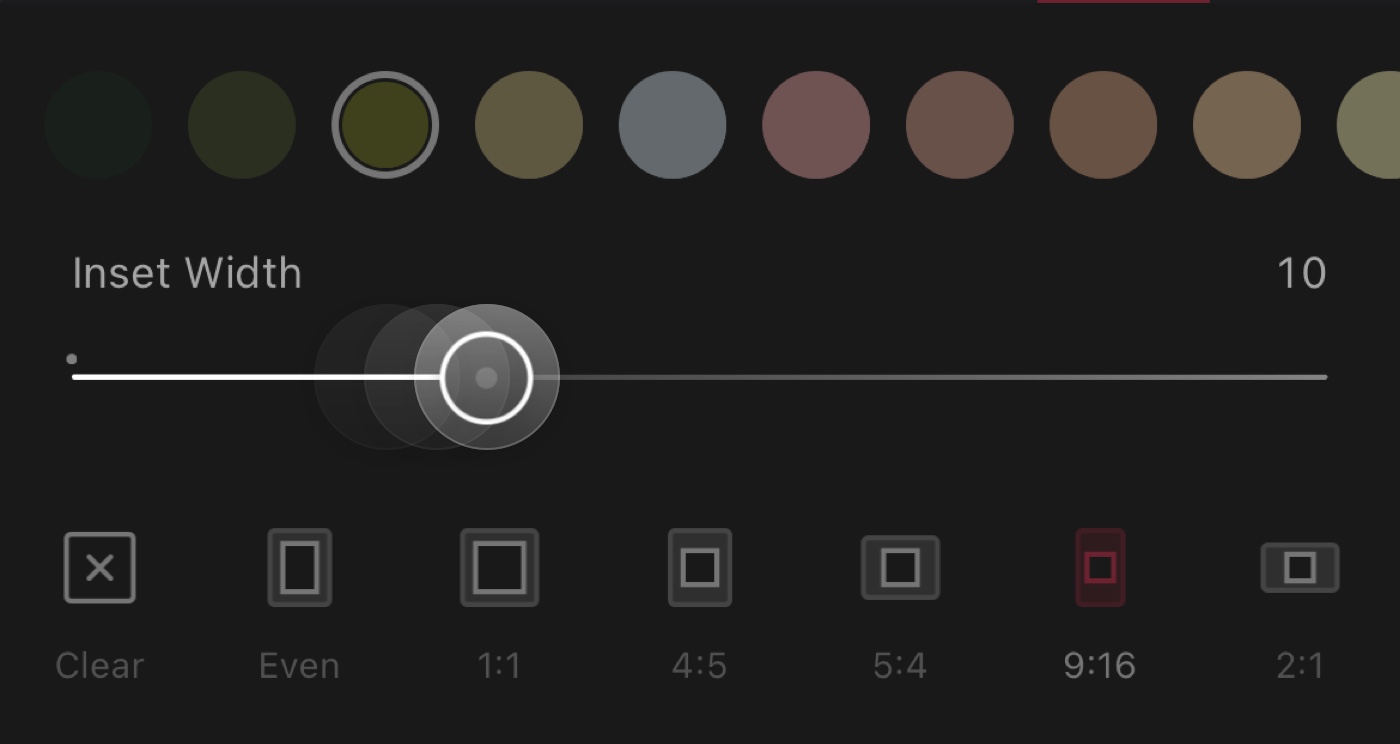
When exporting we allow you to add an inset frame to all your exported photos with just a simple tap. When exporting we actually use the last used frame inset size from the Frames tool. So if you want to change the frame inset for export, head to the frame tool and adjust to your hearts content.
7. Hide Preset sets
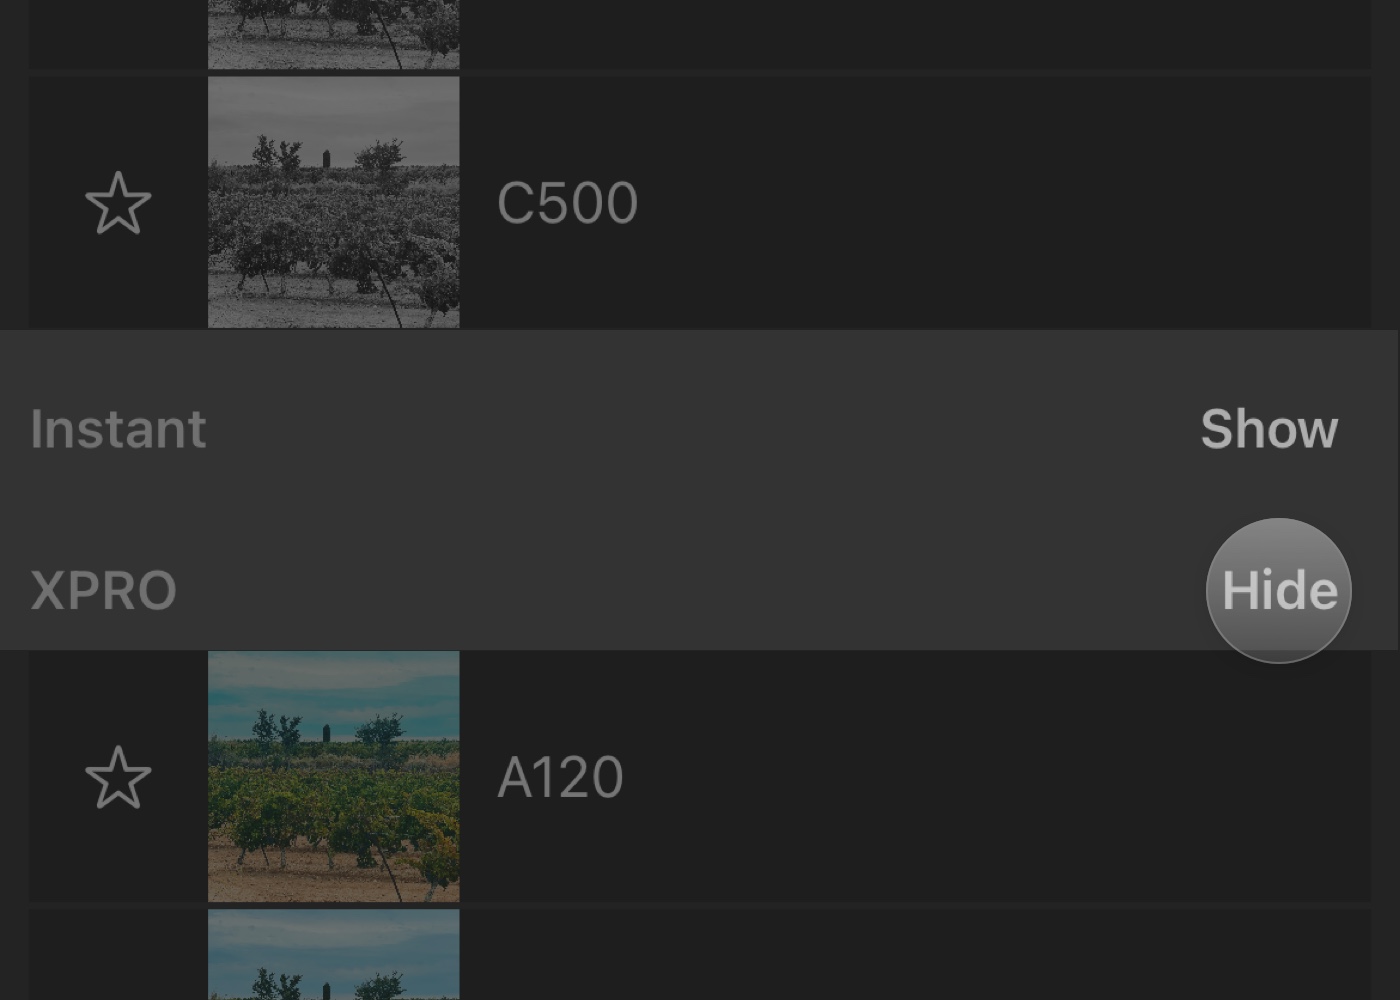
As your custom preset list grows, we can imagine you might want to focus your preset list and hide our pre-bundled presets. All you have to do it tap the list icon on iPhone or enter Manage mode on iPad and Mac, and you’ll see the option to hide any set of presets you don’t use, enabling you to fully curate your library, making it even easier to navigate and use. Any favorited presets in a hidden set will still show up in Favorites, so you can keep only the ones you love just a tap away. Learn more about preset management →
8. Raw + JPG power moves
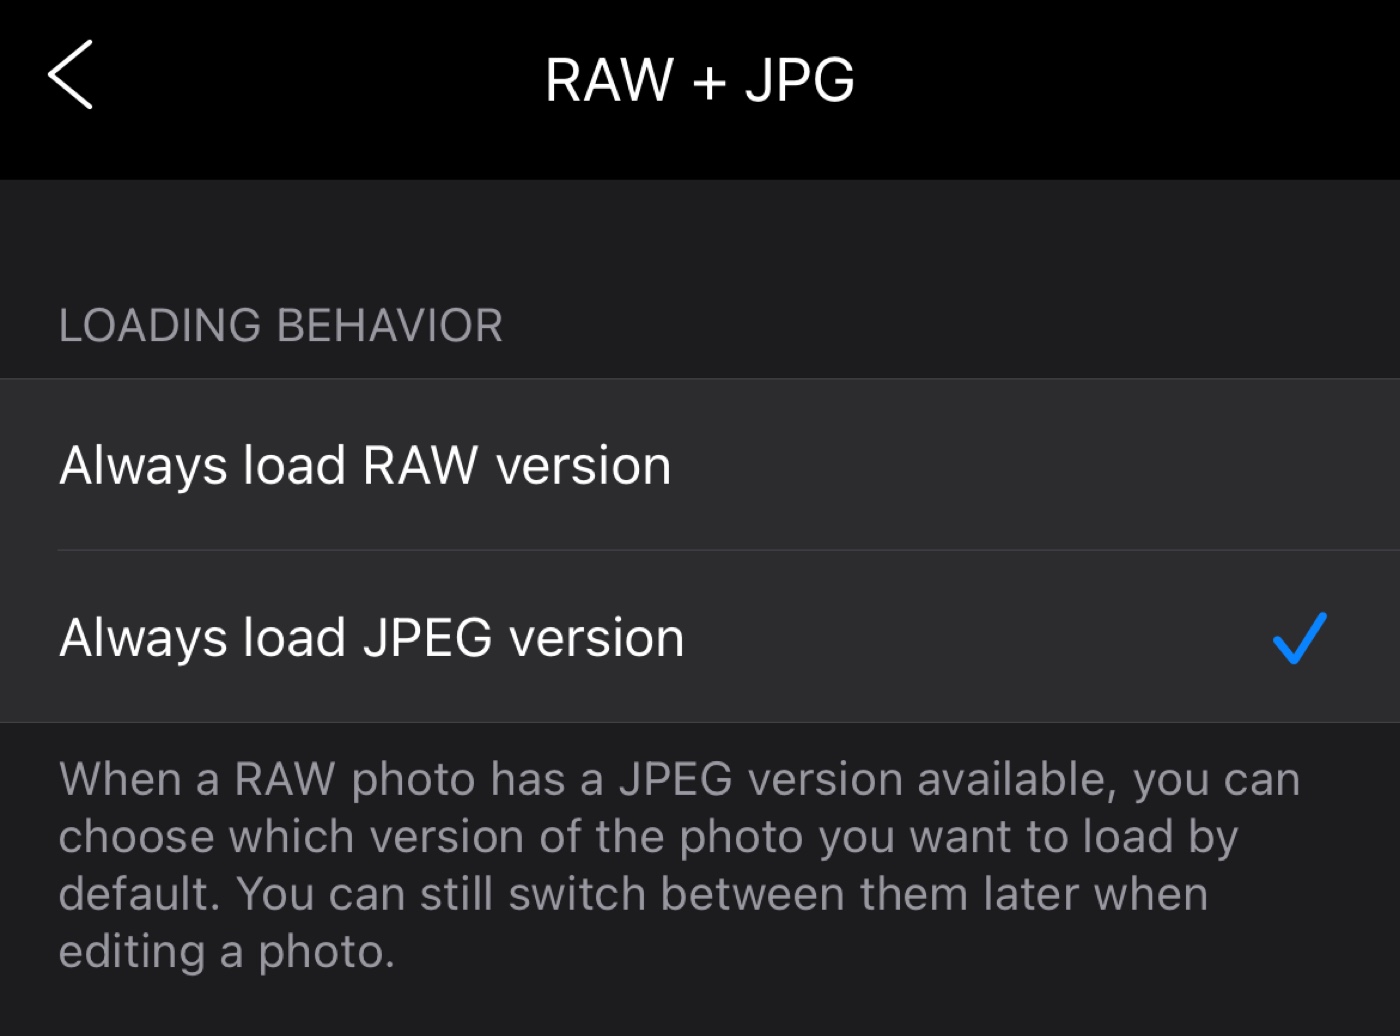
It has gotten quite common for cameras and apps to shoot photos in this combined file format. We provide you the ability to switch between the two formats simply by tapping the badge shown in the top left when viewing or editing the photo.
Additionally, you can also change which of the two formats you would like to load by default. We have set it to RAW, but we can imagine you’d want it to be JPG to make things a bit faster. You can easily change whichever you prefer in our Settings → RAW + JPEG Options.
9. Curves track color gradients explained
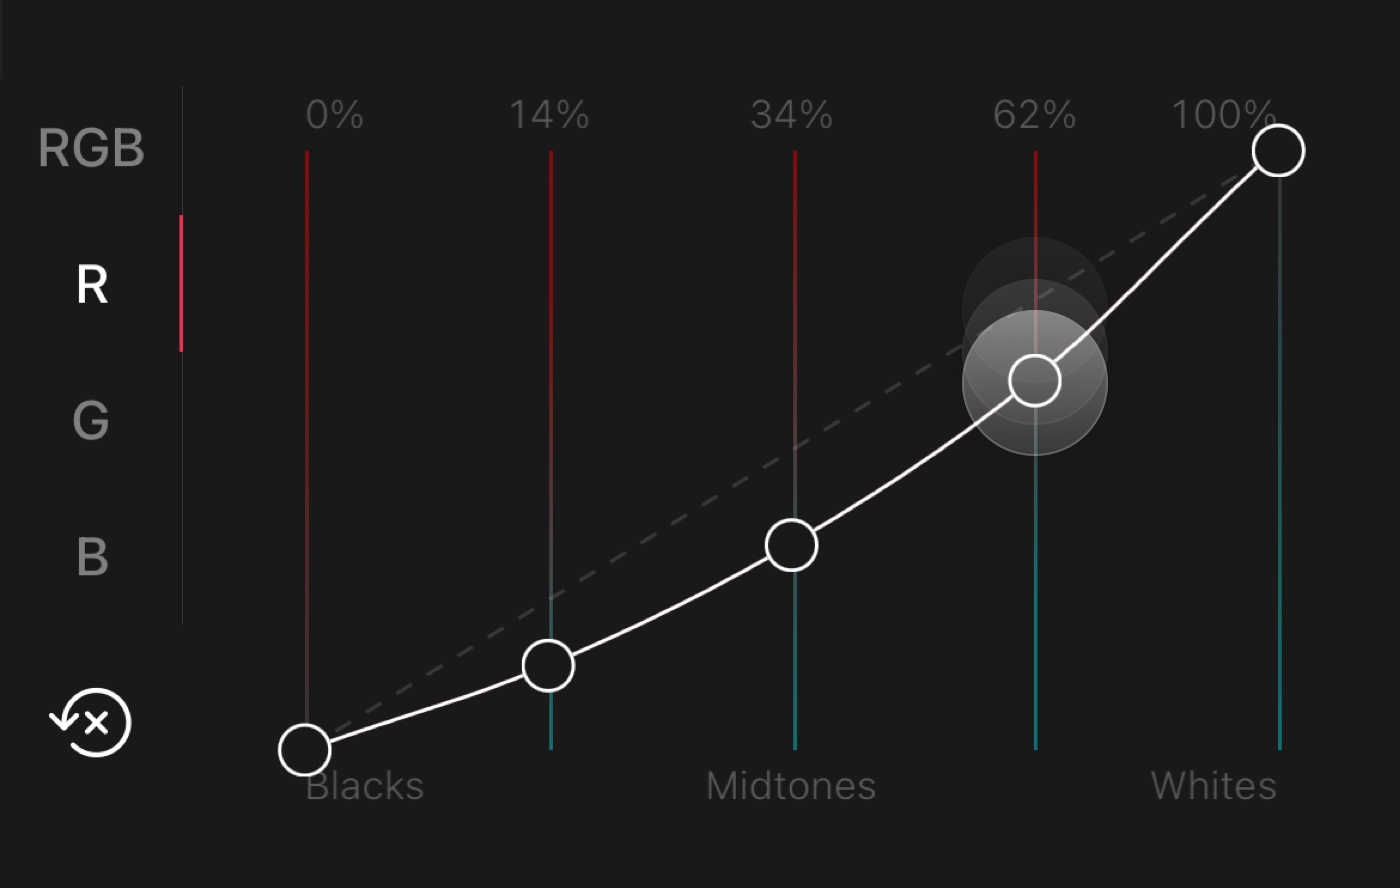
We’ll be the first to admit that the Curves tool can be a daunting tool to enter for the first time. Which is why we have worked hard over the years to make it as easy as we could. One of the details that helps quite a bit are the color gradients we show on the curve tracks to help visualize what will happen. Say you are in the Red channel, and you’d move the highlights slider down, as you can see those highlights will be turning cyan. If those track colors wouldn’t have been there, your guess would have been as good as ours as to what would have happened.
10. Customize the app icon and appearance
![]()
Over the year we have created a rather large collection of alternate app icons for you to choose from. Every major version has come with an app icon update, and starting with the introduction of Darkroom+ we added a broad set of stylistic variants with several updates as well. Giving you a lot of creative options to customize our app icon on your home screen.
Note: changing the app icon from within the app is not available in the Mac app. We created a dedicated page detailing how to achieve it manually!

