Welcome to Darkroom
Darkroom is designed to be familiar to use and easy to navigate across your iPhone, Mac, iPad or Vision Pro. In this guide we’ll help you understand how to get around and where everything can be found.
Darkroom has three main areas:
- Library, where you browse and manage your photos and videos.
- Viewer, where you view, edit, and choose between your photos and videos.
- Export, where you save or share your photo and videos.
The Library View

Preview Grid
If you have chosen to give Darkroom access to all of your photos, you should see them all here, no importing needed. Note that you don't have to do this, you can also give it access to one photo at a time. Please note, we don’t do anything with your photos without your explicit consent. We also don’t upload them to our servers, we don’t analyze them. We just show you your photos from the Apple iCloud Photo Library.
1 — View & Edit. On iPhone, iPad and VisionPro opening a photo to view or edit is as simple as tapping it. On Mac we use the native behavior, which is to double click!
2 — Batch. On iPhone, iPad and Vision Pro, at the top right you will see the Batch button which will allow you to select multiple photos. Once photos are selected, the Batch actions bar will appear at the bottom. On iPhone and iPad you can quickly start Batch selection by simply swiping left or right on the photos you wish to select! On Mac, you can multi select by default, use the "command ⌘" and "shift ⇧" keys while selecting to extend your selection, and the batch actions show at all times at the top right in the toolbar.
3 — Settings. On iPhone, iPad and Vision Pro, at the top left you will find the gear icon, tap to open our Settings. On Mac you can head to the "Darkroom" menu and click the "Settings..." menu item. This is a good place to look around, you’ll find plenty of useful options.
Album List
4 — Folders & Albums. On iPhone you will find a bar at the bottom of your Preview Grid that has 3 smart albums (Recents, Favorites, Edited) ready for you. But you can also pick and search for any other album on your iPhone by tapping on the left most option with the ^ triangle. Which in turn will show you all our Smart Albums and all of your personal Folders and Albums in your Apple iCloud Photos Library. On iPad, Mac and Vision Pro, our album list is always located on the left-hand sidebar.
5 — Import. At times you might want to import some photos or videos from a different source than your Apple iCloud Photos Library. The Import option is the way to do that. It works through Apple’s Files app, so anything connected to it, including your DLSR memory card or connected USB drive will be accessible.
Drag and Drop — On Mac you will be able to drag and drop photos to the library from your desktop. And on iPad you can also drag and drop photos from your library to any of the albums shown in the album list on the left.
The Photo View

Navigation
Darkroom is designed to be easy to navigate, and familiar to use across all your iPhone, Mac, iPad or Vision Pro. Some of the more unique and most efficient ways to move around in Darkroom make use of gestures, allowing for extremely easy one handed or even just thumb based navigation on iPhone, as well use of keyboard shortcuts on iPad and Mac. We have made sure though that you can get around without knowing any of them. But knowing them is like having a super power!
- Close. On iPhone and iPad you can swipe down to close the photo. On Mac you can drag the image downwards.
- Previous/Next. On iPhone and iPad you can also swipe left or right to navigate between your previous and next photos. This even works when you have your tools open. Allowing you to edit rapidly through photos, even by using copy and pasting, or do quick comparisons. On your iPad and Mac you can also use the arrow keys to quickly navigate through your album.
- Before and after comparison. On iPhone and iPad you can tap and hold your finger on the photo to see the original. On Mac you can use just tap-and-hold your mouse on the photo or video. And on iPad and Mac you can also use the dedicated button for it.
- Zoom. You can do a quick double tap to zoom into your photo, and double tap again to zoom out. Or use a pinch gesture to zoom into any area of the photo you want. And the swipe around with one finger to pan around the photo.
- Hide the interface. When viewing or editing a photo you can simply tap on the photo briefly once to hide all the interface to just see your photo. Just tap once more to show it all again.
Actions
In our main toolbars shown at the top of Darkroom, actions on the left typically take you back, and actions at the right move you forward.
1 — Back. There is a clearly marked Library or < back button to go back to the library. On iPhone and iPad you can also Swipe down to close the photo, and even on Mac you can drag the image downwards.
2 — Export. After editing your most likely next step is for you to save to use elsewhere, or share. We explain more on this view further down.
3 — Actions. On iPhone we “hide” quite a few secondary options for you here. Ranging from show/hiding the Histogram or Metadata viewer, to many of the photo management options such as “Add to..”. On Mac and iPad we expose quite a few more depending on how much space we have.
4 — Photostrip. On both iPad and the Mac we have the Photostrip, which shows you all your photos in a thin strip on the left side of your screen. Allowing you to quickly navigate through your photos. And it even has all the management context menu options you can find in the library.
Tools
5 — Swipe up to reveal tools. When you are viewing a photo or video you can either tap any of our tools to open them, or you can quickly swipe up to reveal the adjustments (sliders) tool on iPhone and iPad. On Mac you just click the tool you wish to open. There are many tools accessible through our main toolbar, and some through or our photo actions menu. We’d like to invite you to please take some time to explore them.
On iPhone we also have the Flag & Reject features accessible by swiping the toolbar right, or tapping on the small < arrow at the left of the toolbar. On iPad and Mac the Flag and Reject options are always available and conveniently sit in the toolbar.
6 — Before and after comparison. In order to make edits it’s actually pretty useful to be able to check what the original looked like. On iPad and Mac we have a dedicated button for it. You can also tap the eye 👁 icon next to the tool title to see the original. As mentioned before, on iPhone you can tap and hold your finger on the photo to see the original.
Powerful Editing Tools
Darkroom offers a comprehensive suite of powerful editing tools to help you achieve your creative vision. From basic adjustments to advanced Color Grading and Masks, there's something for every photographer's needs. Tap through to explore some of our most powerful tools that help set Darkroom apart:
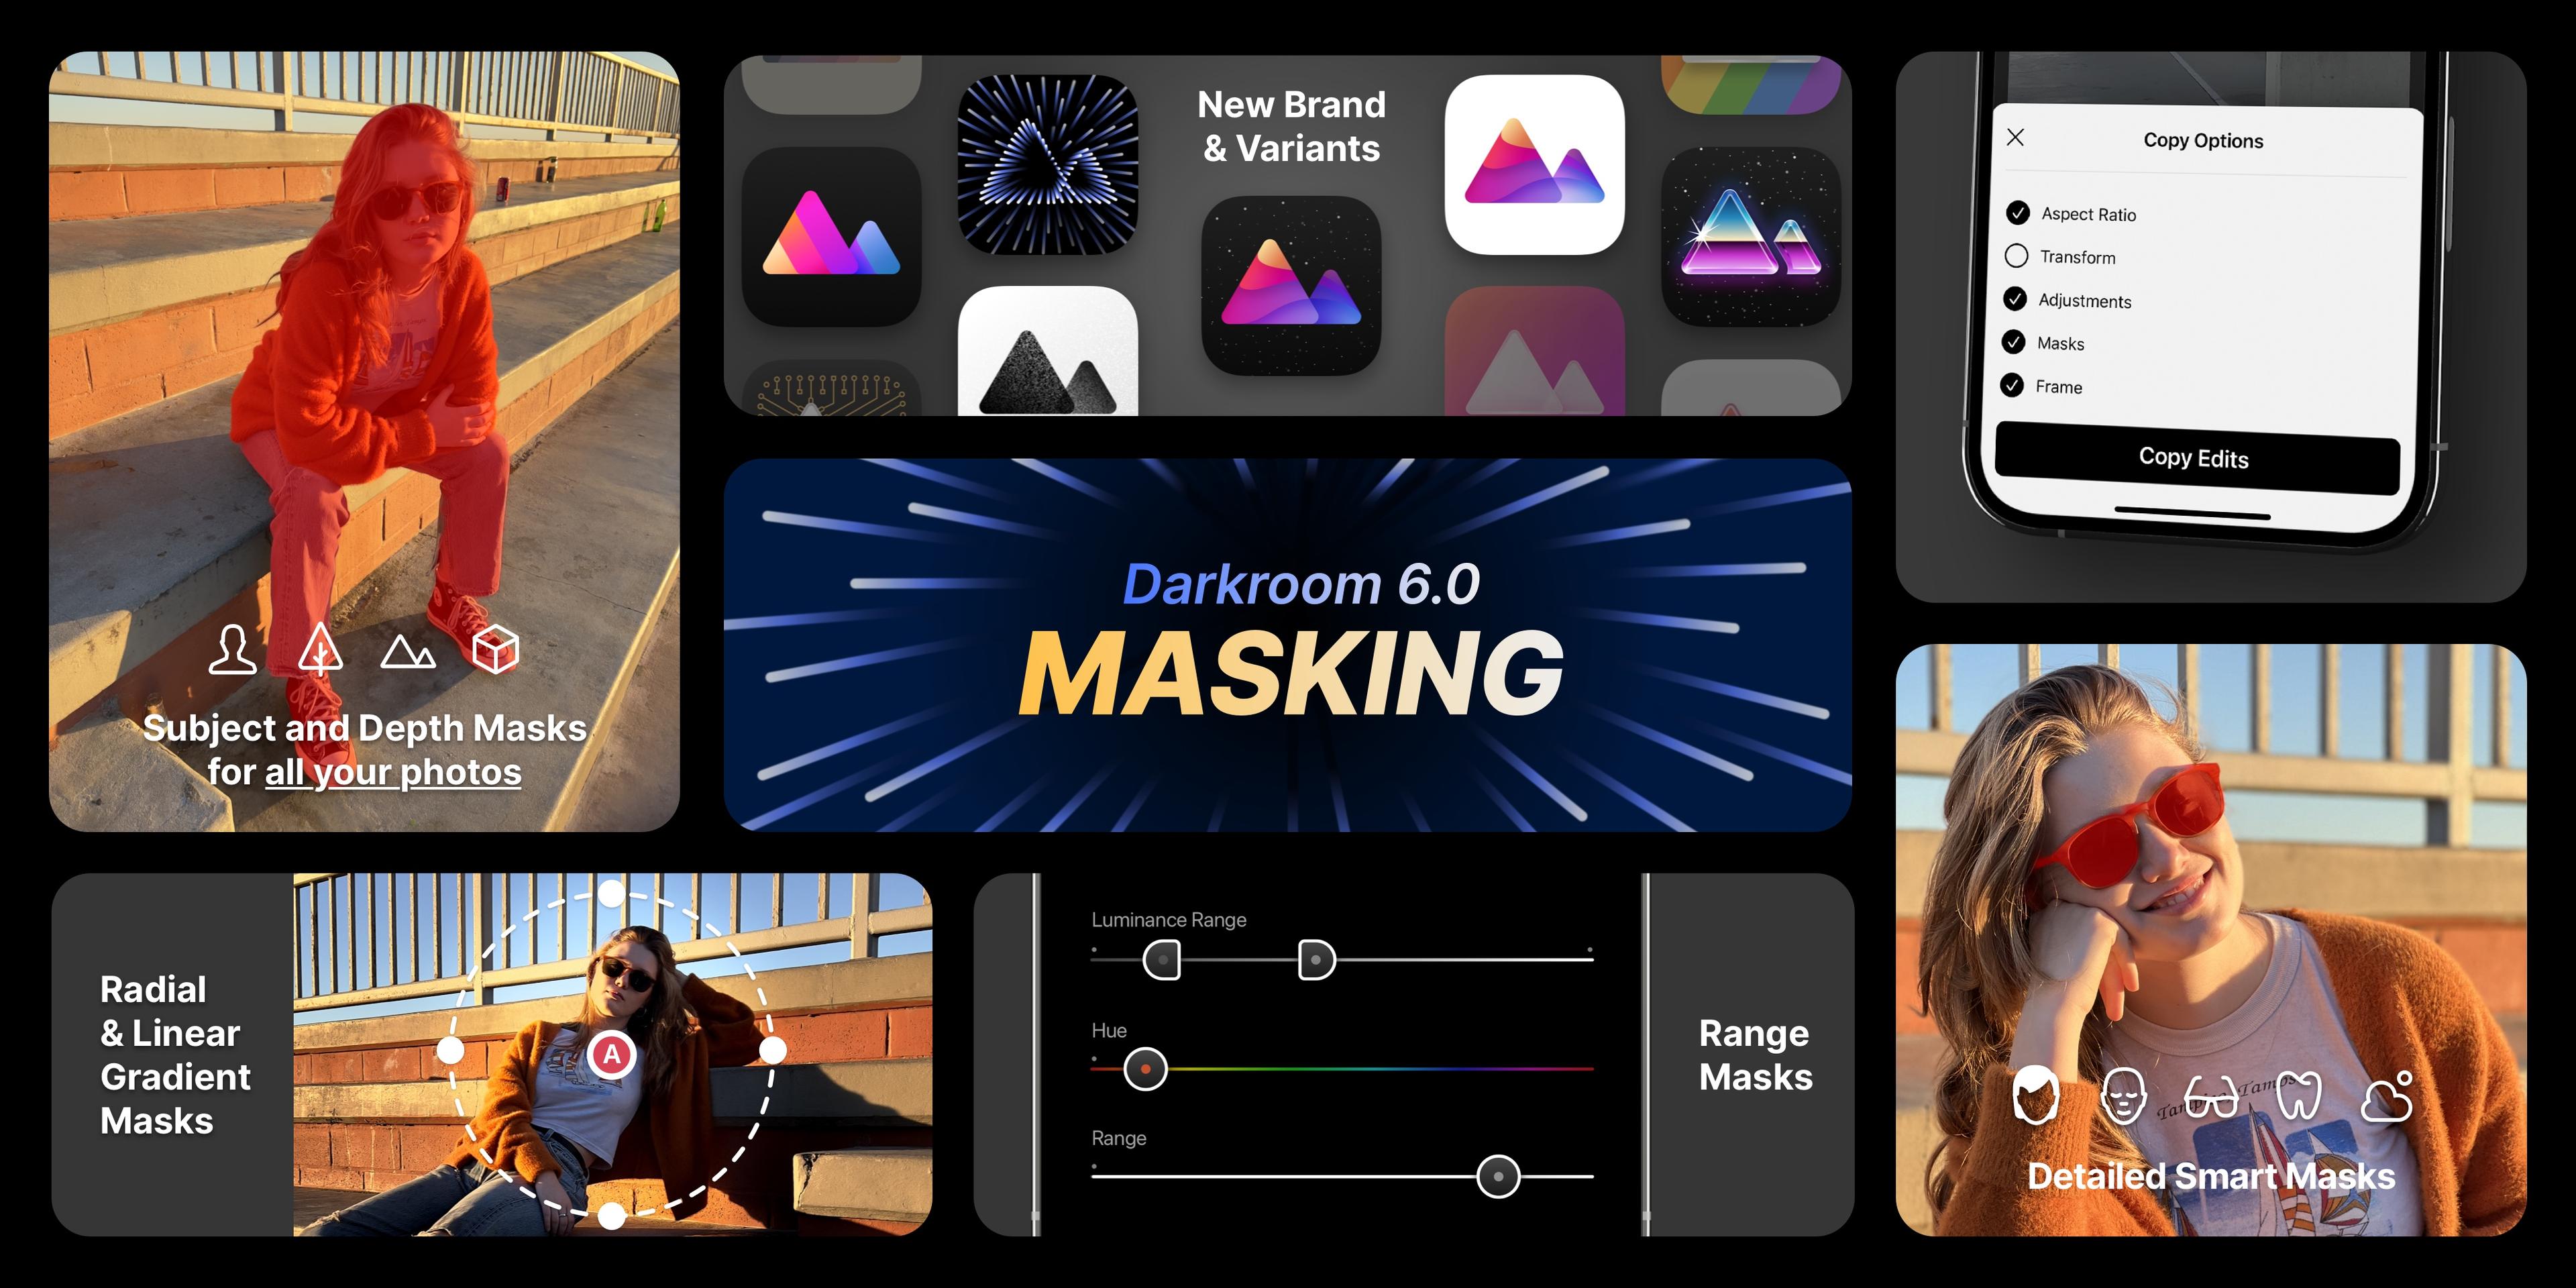
Make Local Adjustments with Masks
Masks are a powerful and essential tool for photographers. Backed by AI, and designed for mobile.
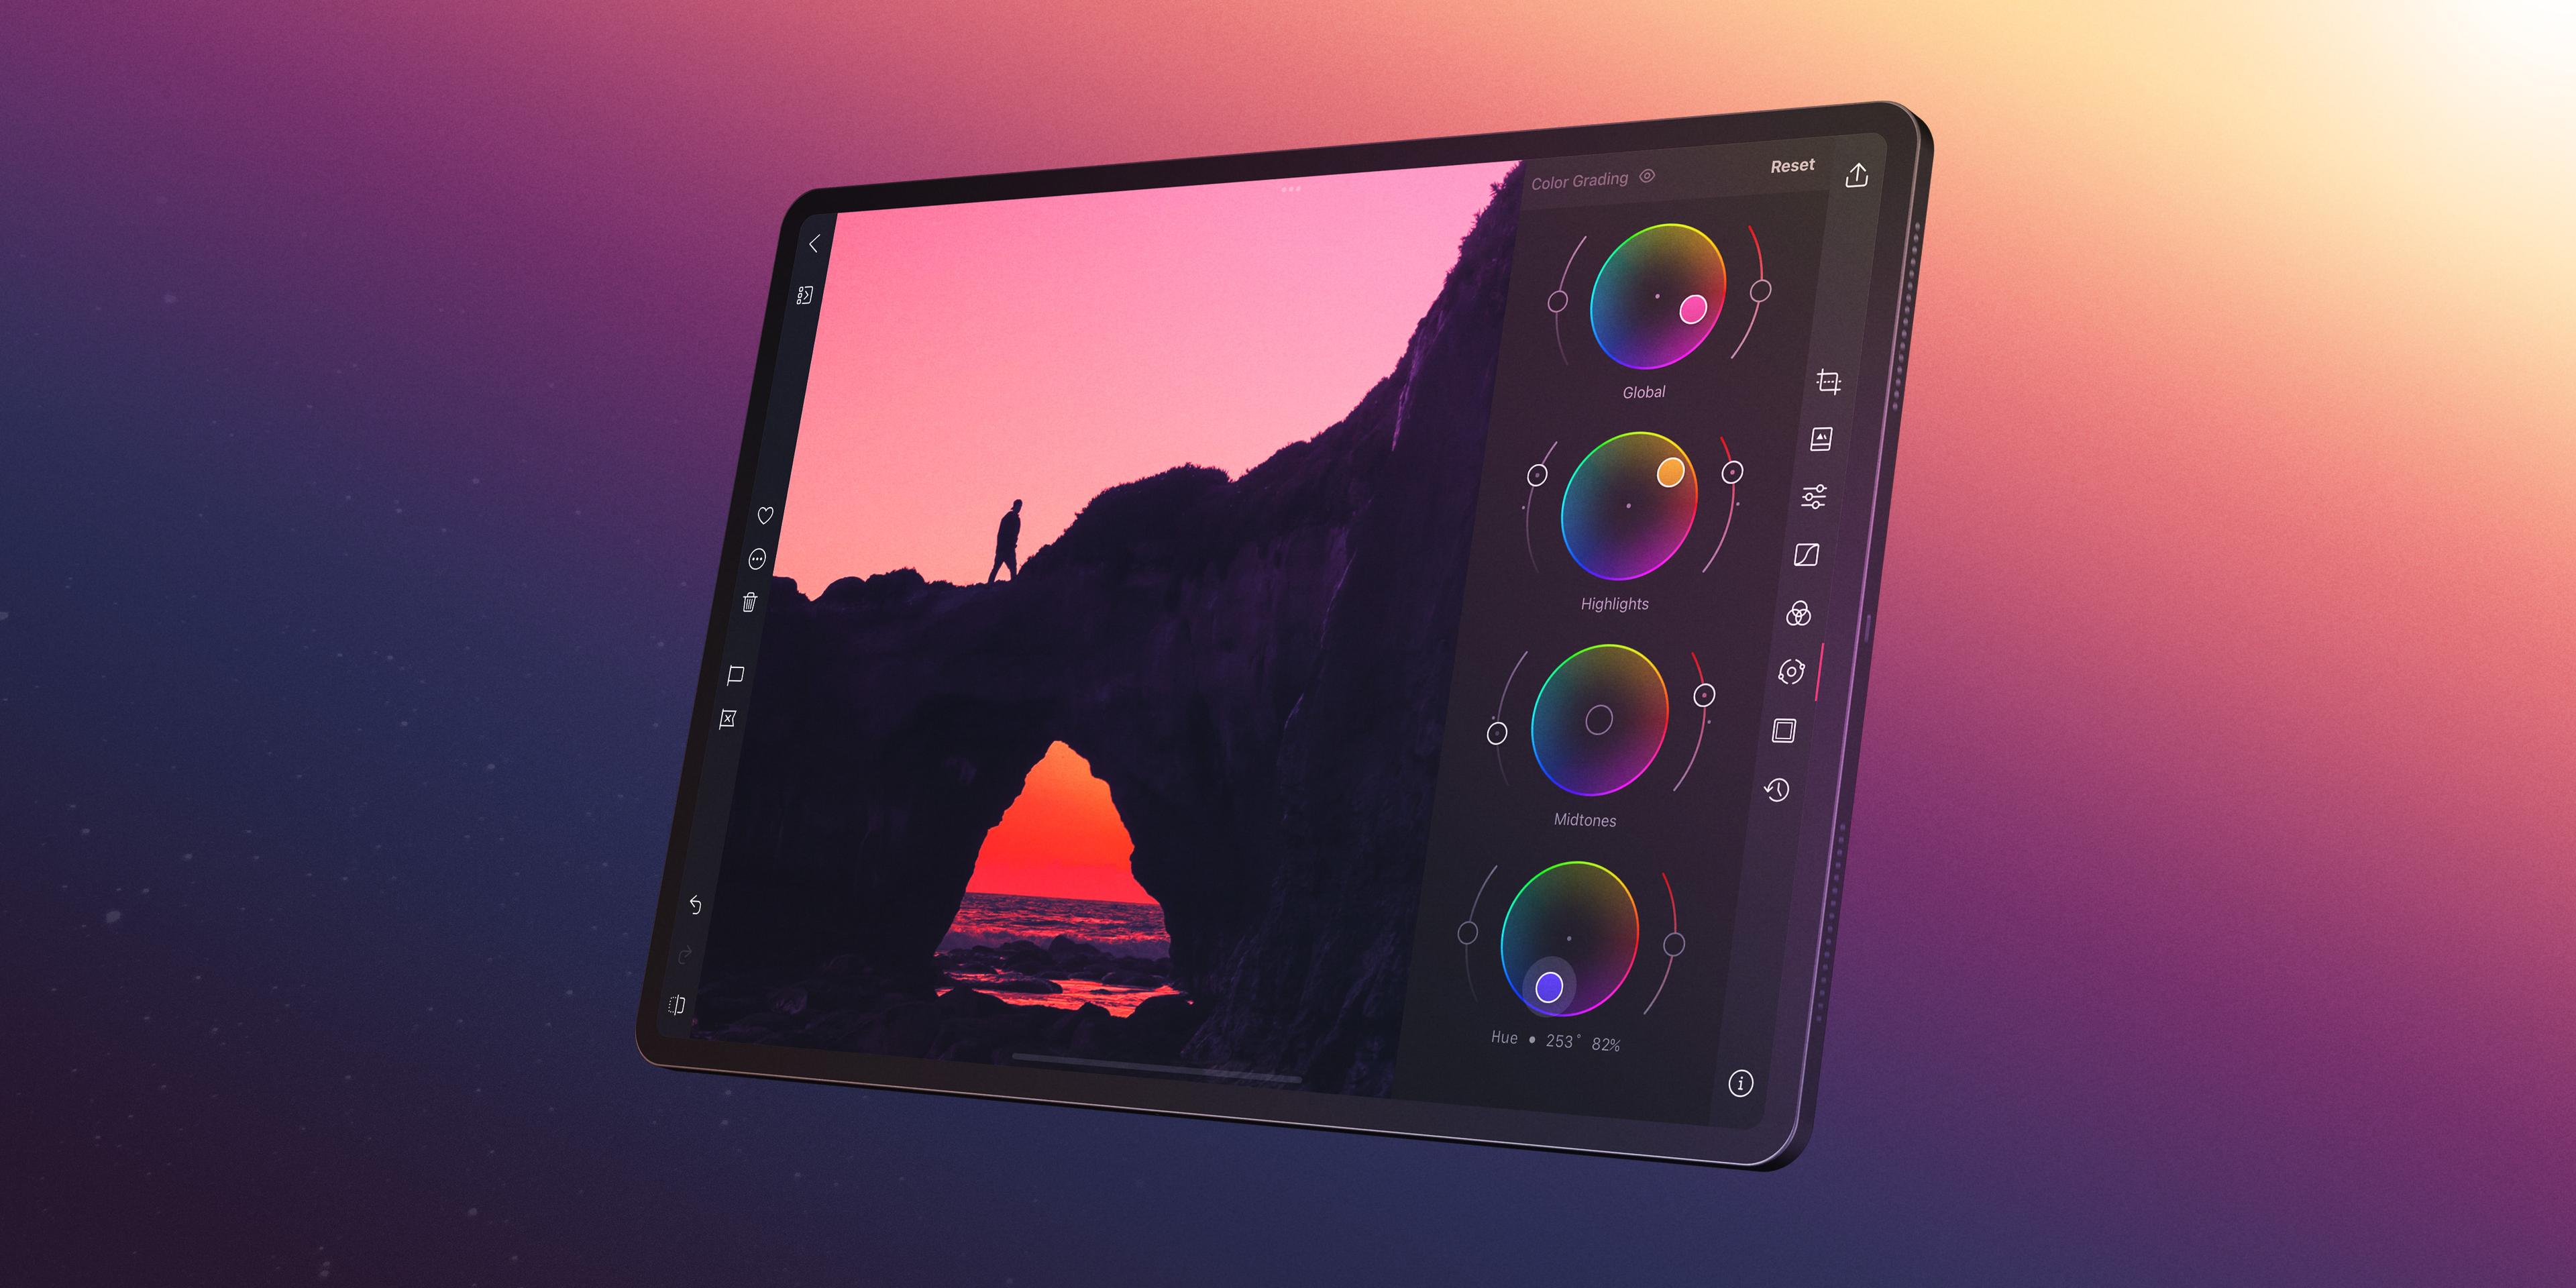
Color Grading in Darkroom
Color Grading unlocks creative expression, giving your photo or video a distinct style by adjusting the tone of your shots.
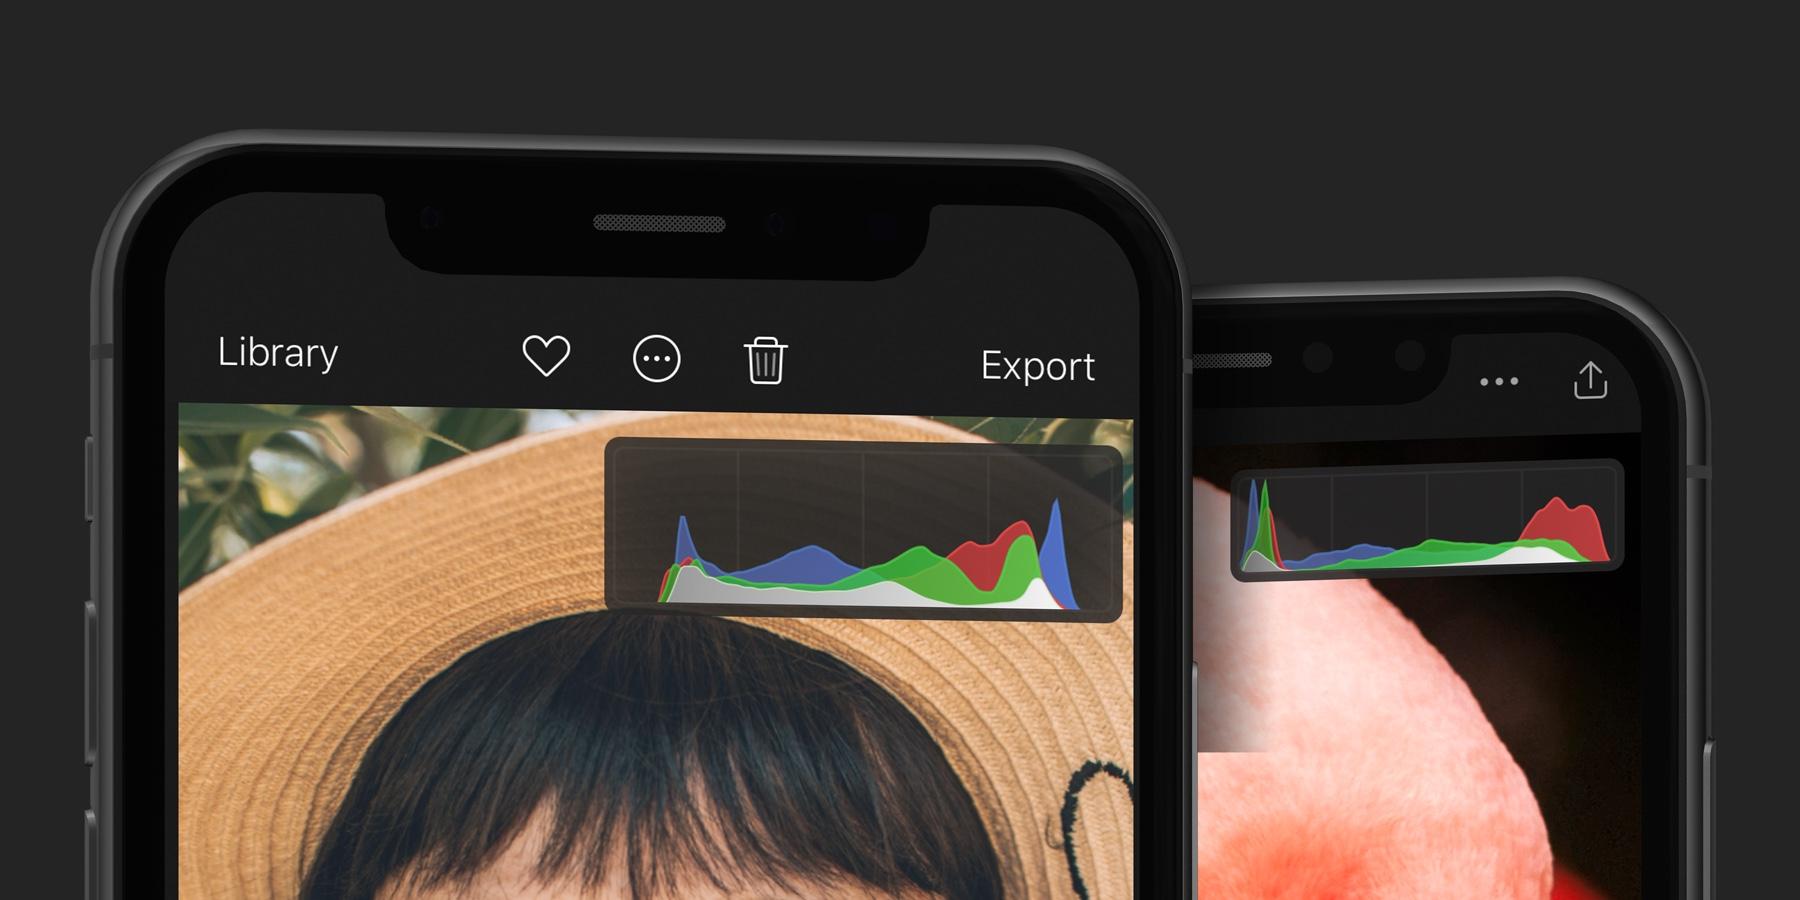
The Darkroom Histogram
The histogram helps you spot and fix exposure and color problems by showing how pixels are distributed across tones in your photo.
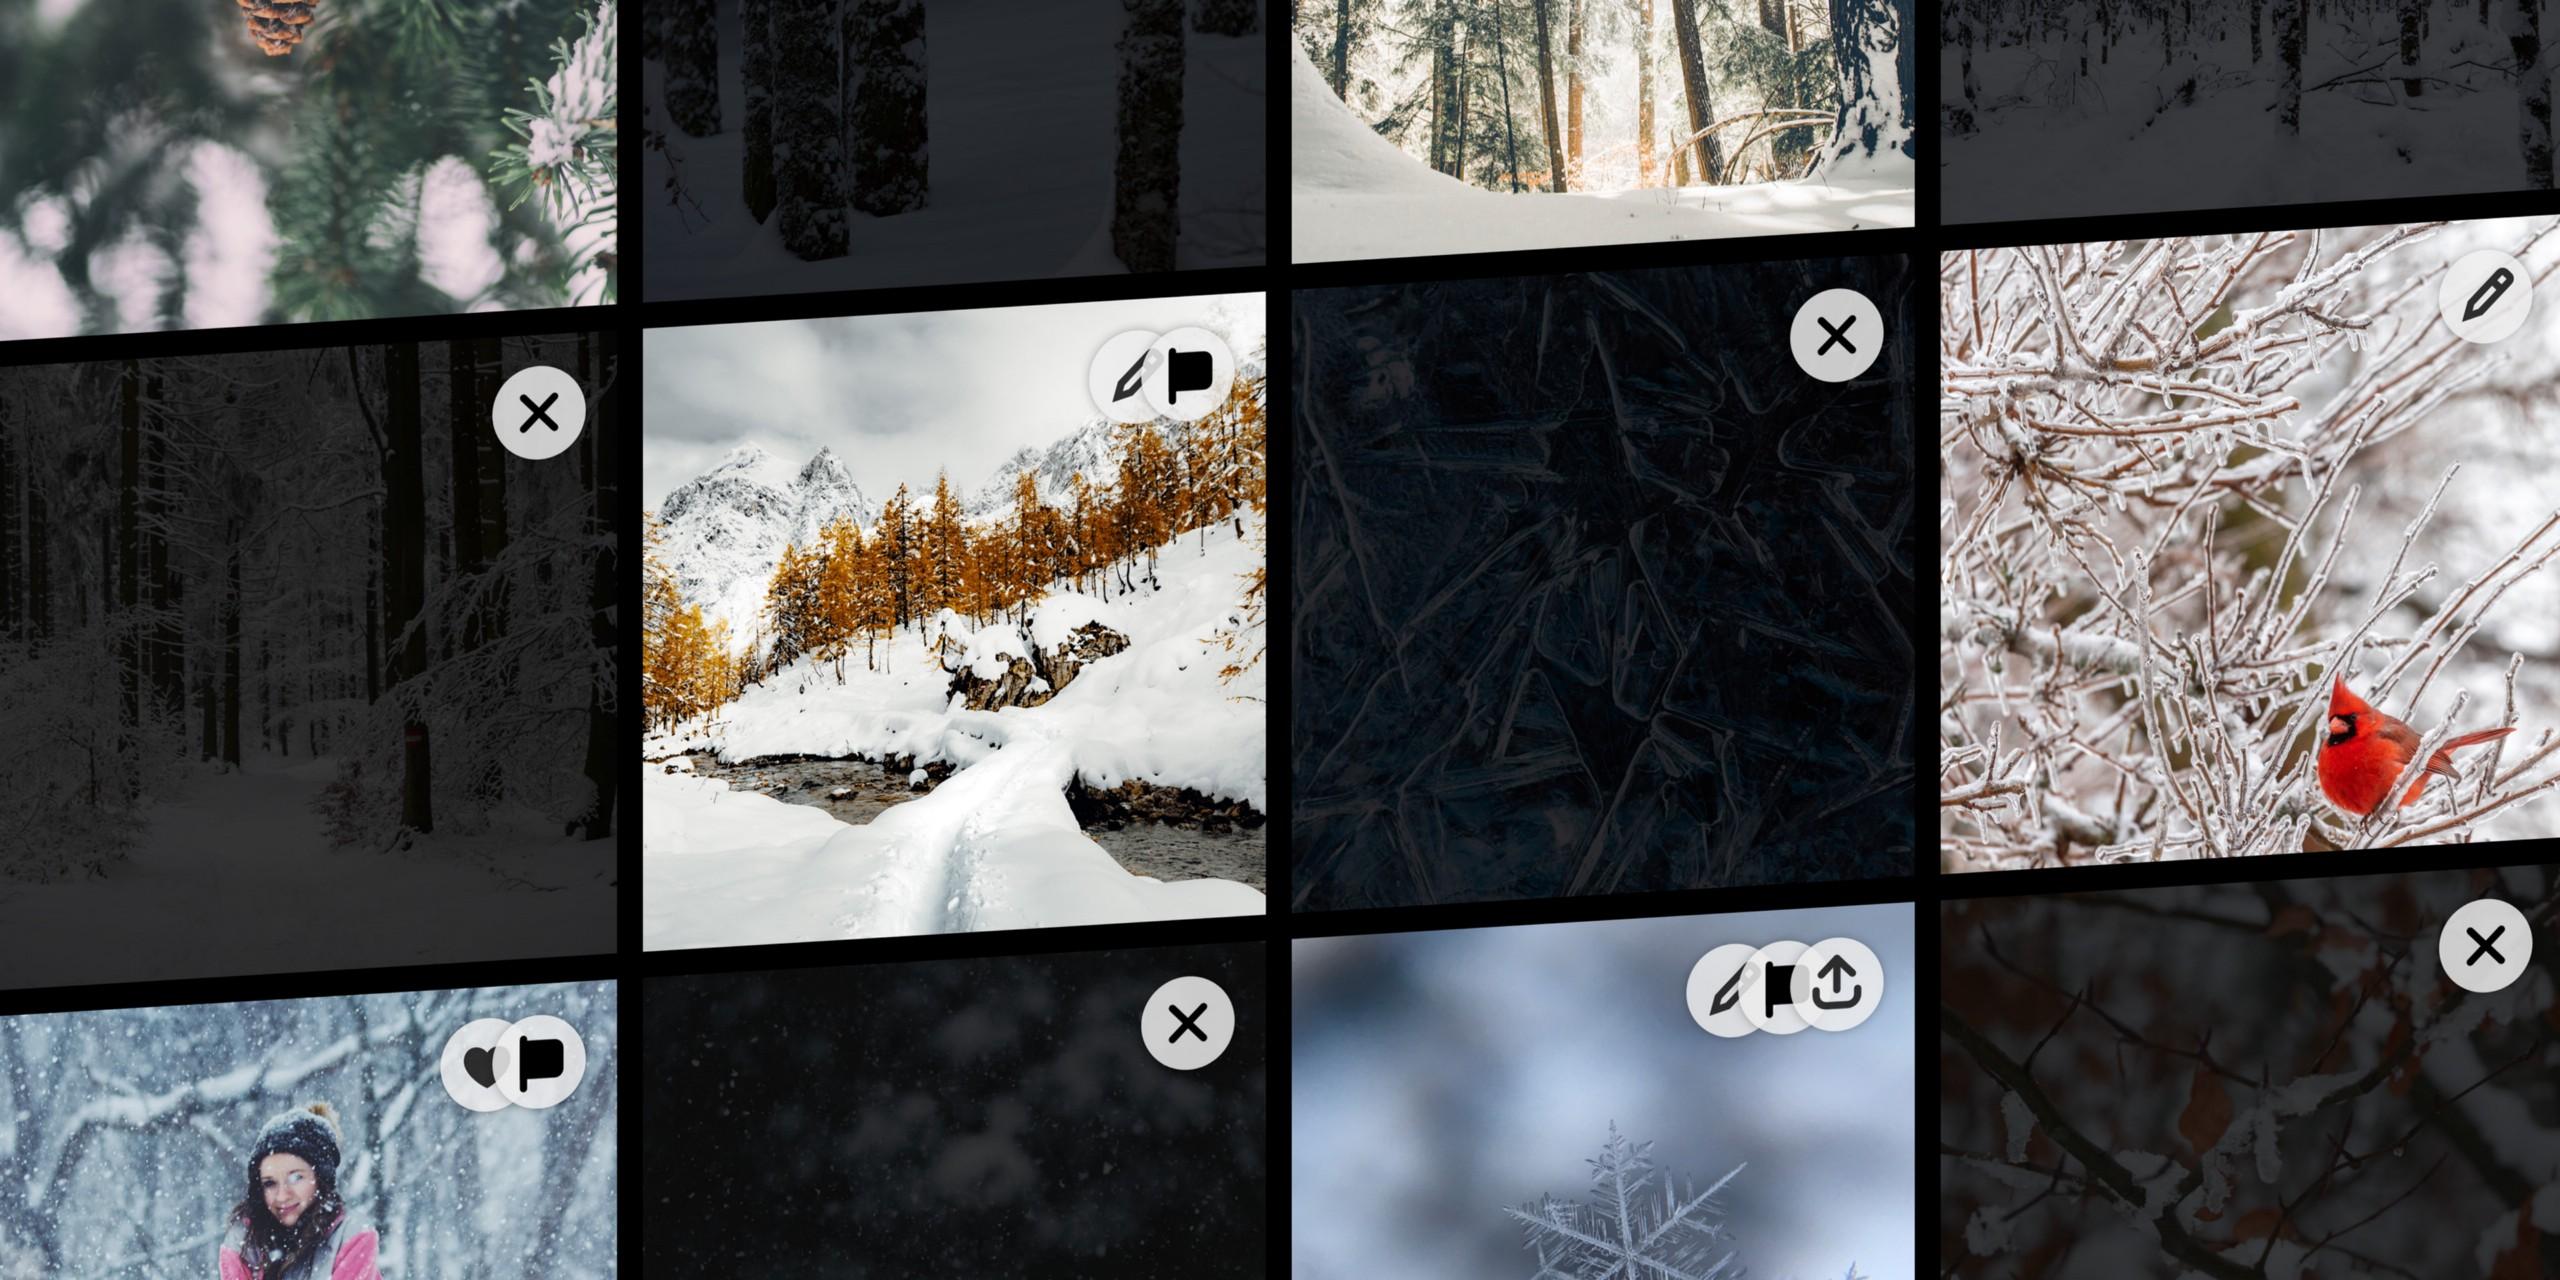
Manage your photo library with Flag & Reject
Efficiently cull and review your photos: Flag what you’re interested in, Reject what you don’t want to keep.
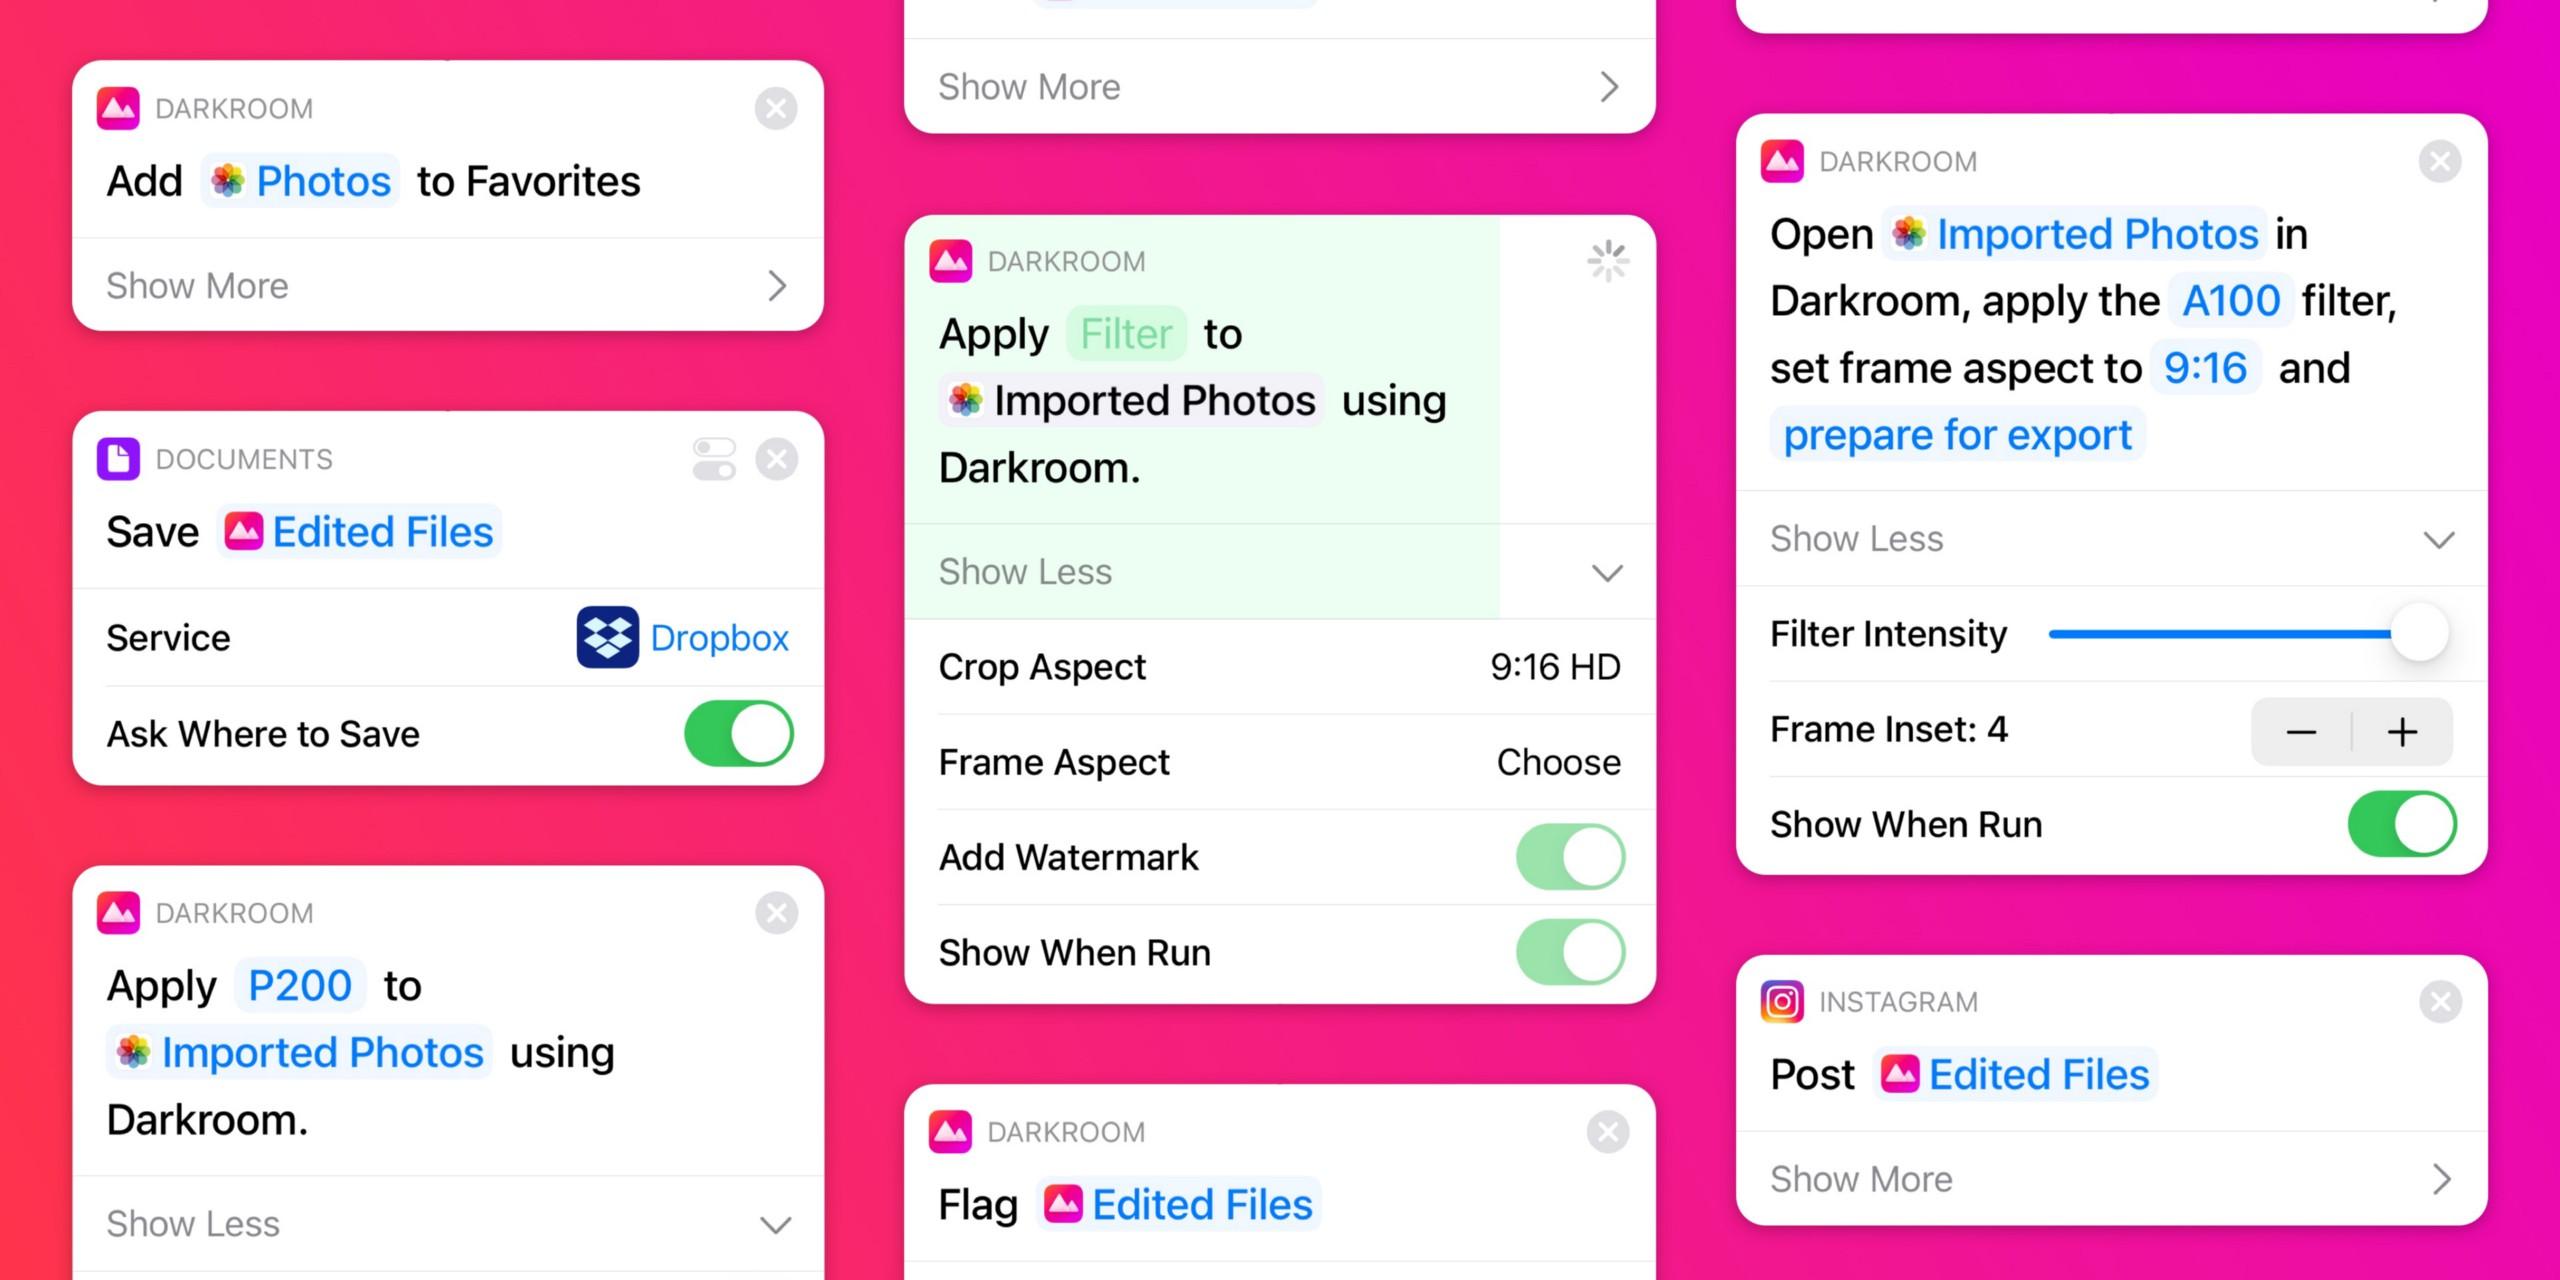
Automate your workflow with Shortcut Actions
We’ve always been very excited about the possibility of integrating Darkroom into shortcuts, but until recently, have been limited by the
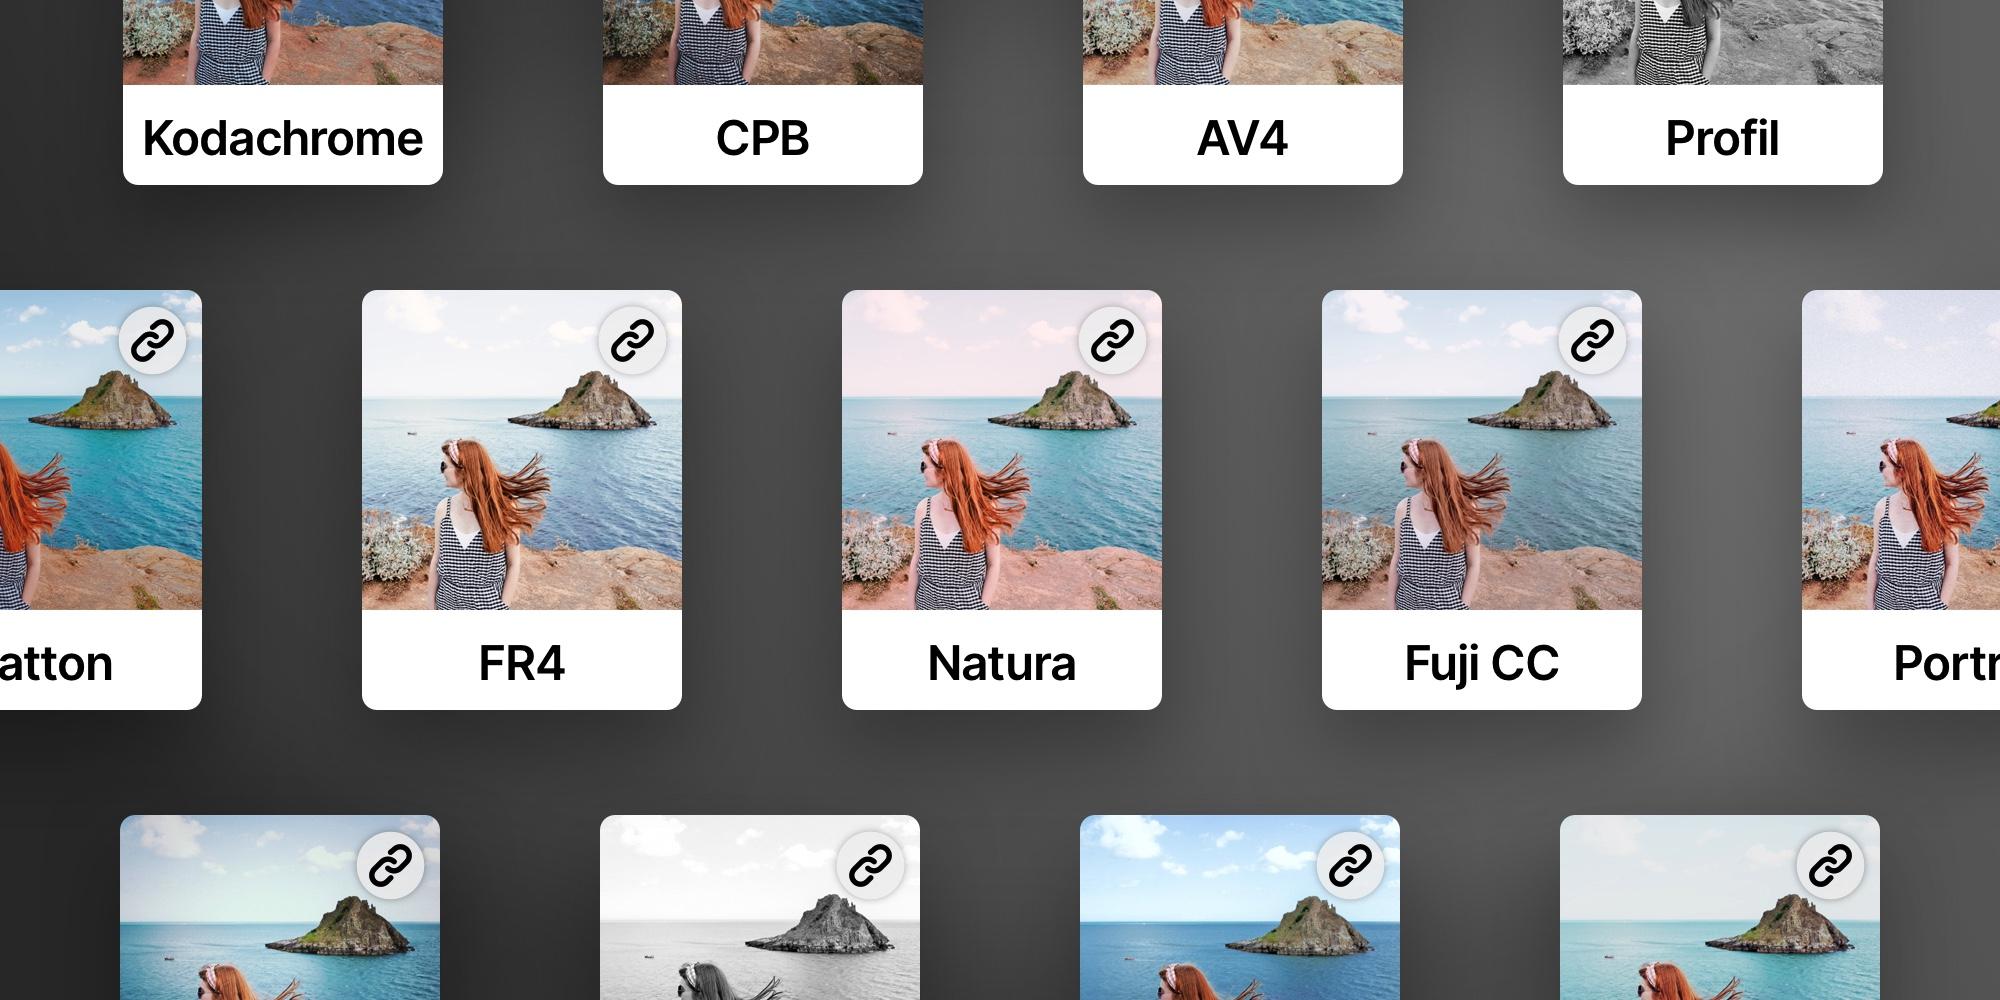
Create your own custom preset
Learn how to create and develop your own unique preset and share it with the community.
The Export View

1 — Save or Share. All edits made in Darkroom are non destructively. That means that any edit you make isn’t directly applied to the original photo. Instead we render the edits live on top of the original, which enables you to undo and change your edits at any time in the future. That also means you have to export, using “Save” or “Save Copy”, for any of the edits you have made to show up in other apps outside of Darkroom.
2 — Export tools. We offer quick access to adding a frame when you export. This is great for things like Stories and Reels, where you want to keep the same aspect ratio. You also have the ability to easily copy some of your hashtag sets for sharing to social networks.
3 — Settings. There is quick access to settings where we offer several options that relate to exporting. Which ranges from setting the file format (for both photo and video), to applying a watermark, location embedding, managing your metadata, or managing your hashtags.
iPhone, Mac, iPad and Vision Pro
Darkroom has apps for all of your major devices. We have made sure that the visual language and navigation between our apps is true to each platform, but similar enough that there shouldn’t be much of a learning curve to get around.

Pro-tip, Keyboard Shortcuts — On Mac and iPad we have made sure to have solid keyboard shortcuts support. Making it possible to more efficiently move around and work by just using your keyboard. To discover all the shortcuts, on iPad tap and hold the command key, and on Mac you can click through the top main menu or head on over to our dedicate help page listing all the available keyboard shortcuts.