Flag & Reject
Flag & Reject is a culling workflow that helps you quickly sort through a set of photos, marking the ones you want to keep and the ones you want to discard. It's especially useful after a shoot or trip when you have dozens or hundreds of similar shots to sort through.
How It Works
Every photo in your library starts in a neutral state — neither flagged nor rejected. As you review your photos, you mark each one:
- Flag — marks a photo as a keeper. Use this for the shots you like and want to keep or edit further.
- Reject — marks a photo for removal. Use this for duplicates, blurry shots, or anything you don't want to keep.
You can always change your mind — flagging or rejecting a photo is non-destructive and doesn't move or delete anything until you choose to act on it.
The Culling Workflow
A typical culling workflow looks like this:
- Review — open an album or your recent photos and start swiping through them one by one.
- Flag keepers — as you go, flag the photos you want to keep.
- Reject the rest — mark the photos you don't want with reject.
- Delete rejects — once you've reviewed everything, filter to see only rejected photos and delete them in one go.
This lets you make quick, low-pressure decisions on each photo without having to immediately commit to deleting anything.
Where to Find Flagged & Rejected Photos
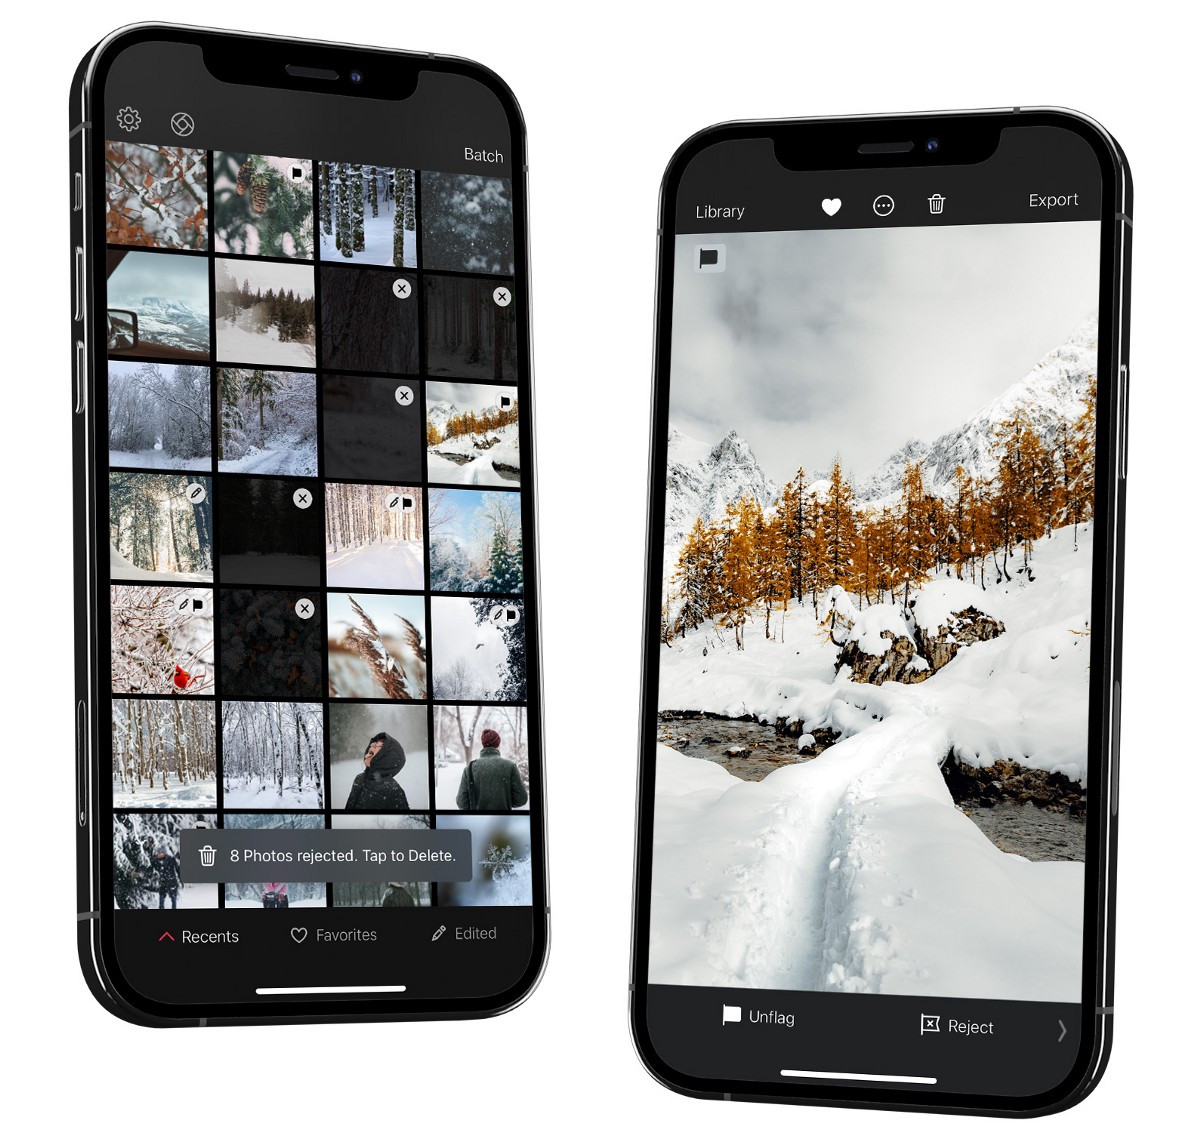
Flagged and rejected photos appear in dedicated smart albums in your album list. You can tap into the Flagged or Rejected smart album to see only photos with that status, making it easy to review your selections or bulk-delete your rejects.
Using Flag & Reject
iPhone
When you're previewing a photo on iPhone in portrait — toolspace collapsed — a photo strip along the bottom lets you swipe or tap through nearby images without jumping back to the grid. Flag and Reject sit with the strip, so you can mark keepers and reject misses as you move through a set.

When a tool is open, swipe the toolbar to the right — or tap the small ‹ arrow at its left edge — to reach the flag and reject buttons. Tap the flag icon to flag a photo, or the reject icon to reject it, and tap again to clear the status. Paired with a swipe left or right to move to the next shot, you can work through a shoot without leaving the photo view.
iPad & Mac
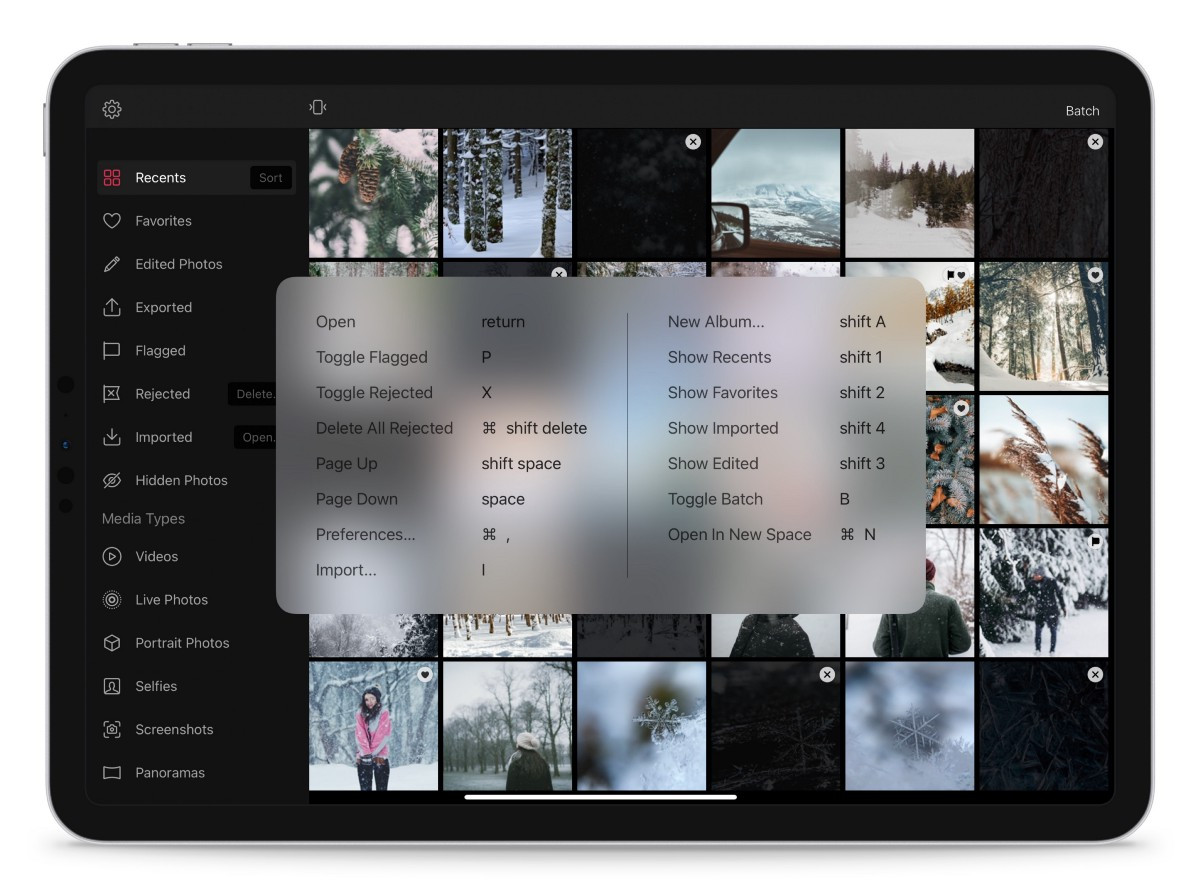
The flag and reject buttons sit in the toolbar at all times, alongside Favorite and Delete. You can also use keyboard shortcuts for faster culling:
- P — flag the current photo.
- X — reject the current photo.
- U — clear the flag or reject status.
- ⇧P / ⇧X — flag or reject and advance to the next photo automatically.
The shifted versions are what make a real culling pass fast: hold Shift and press P or X, and the photo is marked and you advance without touching the arrow keys. P and X alone toggle the mark and stay on the current photo. Your flagged and rejected statuses sync across your devices through iCloud, so a pass you make on iPad is waiting for you on the Mac.
Batch Actions
You can flag or reject multiple photos at once. Select the photos you want in the library grid, then apply flag or reject to the entire selection. This is useful when you've already identified a group of photos you want to keep or discard.
To delete all rejected photos, open the Rejected smart album, select all, and delete. See Batch Actions for more on working with multiple photos.
Frequently Asked Questions
Where are Flag and Reject on iPhone?
When you're previewing a photo in portrait — toolspace collapsed — Flag and Reject sit with the photo strip along the bottom, so you can mark keepers as you move through a set. When a tool is open, swipe the toolbar to the right, or tap the small ‹ arrow at its left edge, to reach the same actions.
Related
- Keyboard Shortcuts — P, X, and the shift-to-advance variants
- Batch Actions — flag, reject, or delete a whole selection
- Library View — Flagged and Rejected live in the album list
- History — copy a look onto the keepers after you cull