Your First Edit
The fastest way to understand Darkroom is to edit one photo all the way through. This walks you from opening the app to a finished, saved image — and by the end you'll have done every step of the workflow you'll use from then on.
Two things are worth knowing before you start, because they change how freely you can experiment. There's no import step: Darkroom reads your iCloud Photos library directly, so everything you own is already there when you open the app. And every edit is non-destructive — your adjustments render live on top of the original, nothing touches the file until you save, and even then the original is recoverable.
Pick a photo that will reward you
Your recent photos fill the grid when you open the app. Scroll, or use albums to find something specific, then tap on iPhone or iPad — or double-click on Mac — to open it.
For a first edit, some photos teach you more than others. A landscape or outdoor shot responds dramatically to contrast and color, so you'll see what each control does immediately. A portrait in natural light shows you how much exposure and temperature affect skin. Best of all is a photo you like but find slightly flat — most phone photos are, and watching one come to life is the clearest possible demonstration of why any of this matters.
Start with a preset
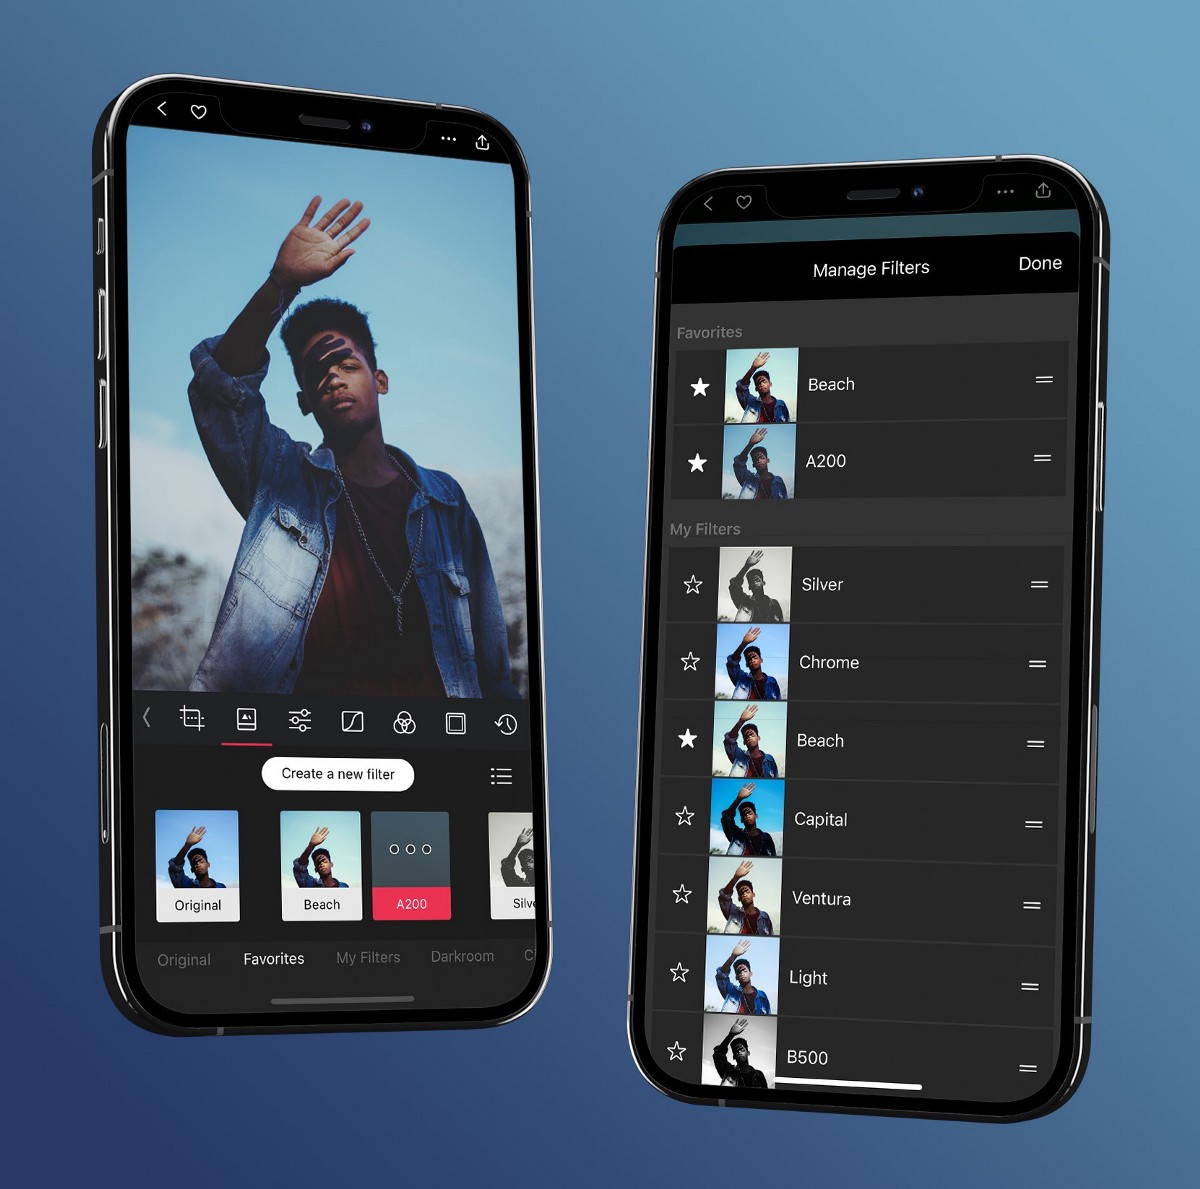
The quickest way to transform a photo is a preset: a saved combination of adjustments, applied in a single tap. Open the Presets tool and browse — Darkroom includes a set of built-in looks, and there are thousands more in Community Presets.
Presets are useful beyond the shortcut, though, because they're completely transparent. Apply one and you can open every tool to see precisely which adjustments produce that look, which makes them the best teaching device in the app. Treat one as a foundation rather than a finished result: set the mood with a preset, then refine from there.
If you'd rather build everything yourself, skip ahead — nothing below depends on having applied one.
Adjust the light and color
The Adjustment Sliders are where most editing actually happens. Work in two passes: get the light right, then deal with color.
For light, Brightness sets the overall level, and Contrast controls the separation between dark and light — a moderate boost makes most photos look more defined. Then reach for the pair that does the real work: Highlights and Shadows adjust the bright and dark regions independently, so you can pull detail back into a blown-out sky while lifting a face out of shadow, in the same photo, without affecting anything in between. Blacks and Whites then set your endpoints — crushing the blacks gives you deep rich shadows, lifting the whites gives you clean bright highlights.
For color, Saturation controls intensity and Temperature shifts the image between warm and cool. Temperature does double duty: it corrects a white balance the camera got wrong, and it sets mood, since warming a photo toward gold feels quite different from cooling it toward blue.
Keep the Histogram visible while you work. It plots your tones from dark on the left to bright on the right, so a graph bunched against one edge tells you the photo is under- or overexposed, and you can watch the distribution spread as you correct it. It's an objective read on an image at a moment when your eyes are adjusting to every change you make.
Two habits make the difference between a first edit and a good one. Tap and hold the photo to flash the original underneath; it's the single most useful gesture in the app, and it will regularly tell you an adjustment you were proud of isn't helping. And judge on consistent screen brightness — editing in direct sunlight makes your display auto-brighten and quietly wrecks your sense of exposure.
Aim for restraint. If an edit looks obviously edited, pull it back.
Crop and straighten
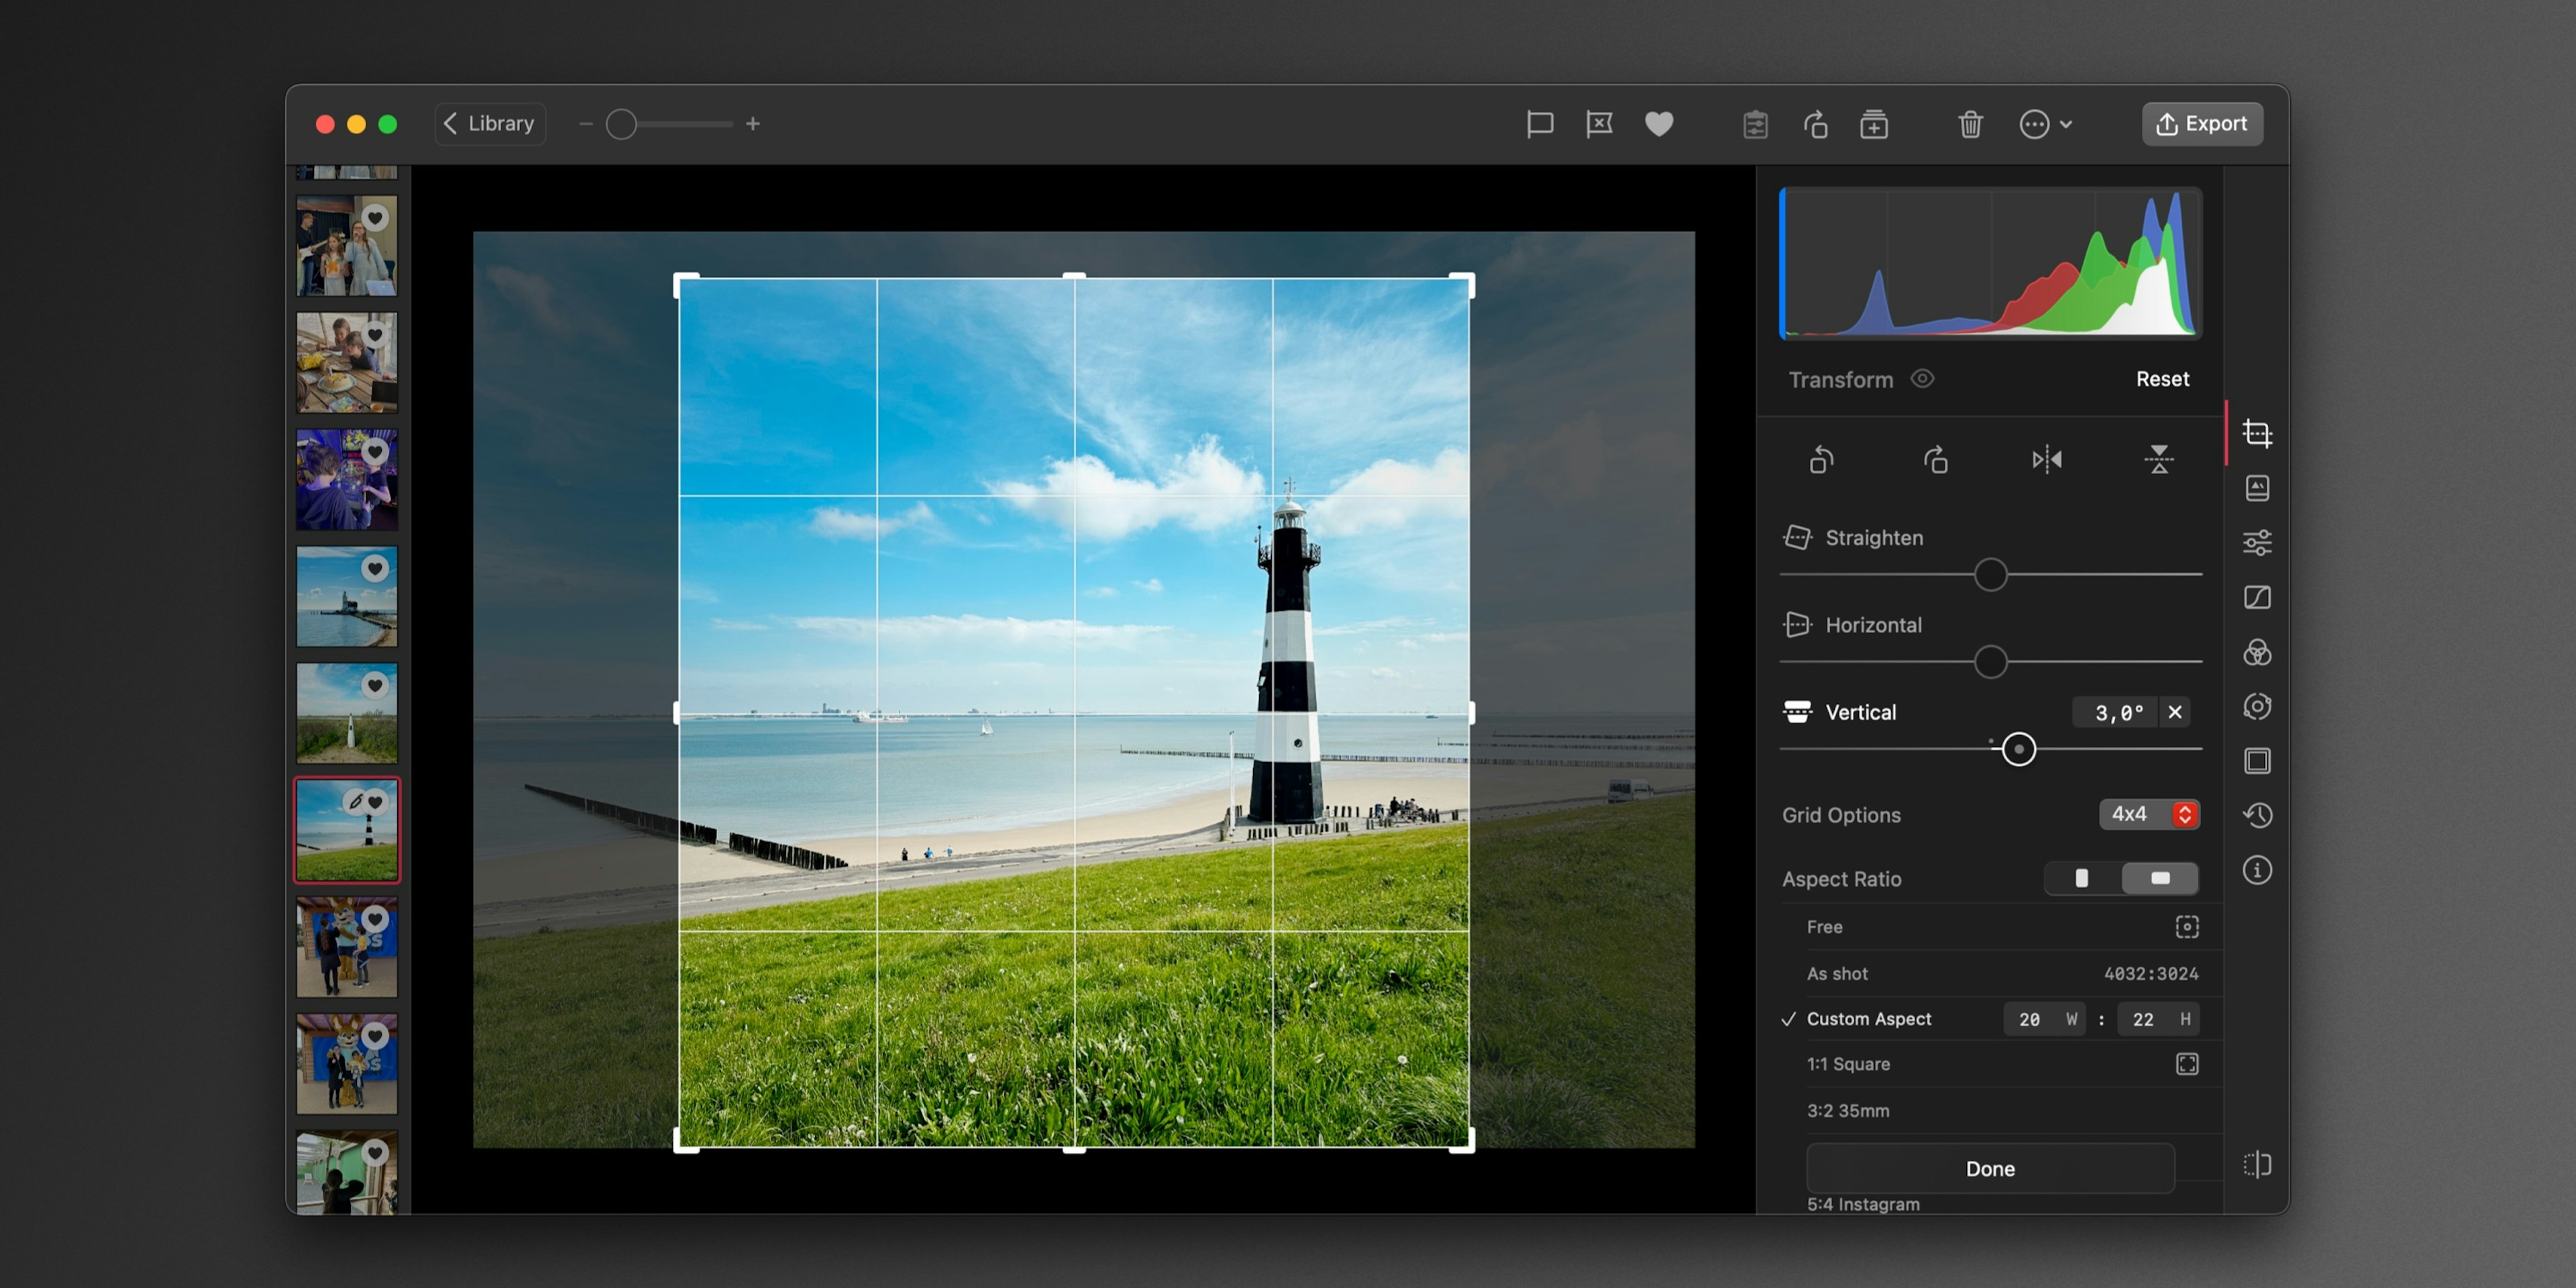
A crop changes a photo's impact more than most adjustments do. Open the Transform tool to reframe.
Straightening comes first — a tilted horizon or a leaning building reads as careless, and a correction of one or two degrees is often all it takes to make an image feel deliberate. Then reframe: the grid overlay helps you place the subject, off-center when that is the frame you want, and a crop can take out a distraction at the edge. If you need a specific shape, the aspect ratio presets include square and wider frames.
Save or share
When you're happy, Save writes the edited version back to your Photos library, while Save Copy leaves the original untouched and creates a new file alongside it. Apple Photos keeps showing the unedited photo until you do one of those. On iPhone and iPad a saved edit remains revertible in Photos, so even this step isn't final — the steps are on the Export page. You can also share straight to another app from the same screen — Messages, Instagram, email — and Darkroom renders at full resolution when you do.
Come back to the photo any time and every adjustment will still be there, live and editable.
Where to go next
Now that you've been through the loop once, a few directions are worth exploring. Masks let you adjust part of a photo instead of all of it — brightening a face without blowing out the sky behind it. Color Grading for Mood uses the shadow, midtone, and highlight wheels to give a photo a deliberate atmosphere. Batch Actions apply one edit across many photos, which is how you keep a whole series consistent. And when you find a look you want to keep, save it as a preset.
Frequently Asked Questions
Do I need to import my photos first?
No. Darkroom reads your Apple Photos library directly, so your photos are already there when you open the app — nothing is copied to our servers. You can grant access to your whole library or one photo at a time.
Will editing damage my original photo?
No. Adjustments render on top of the original, and Apple Photos stays unchanged until you export. Use Save Copy to leave the original completely untouched. On iPhone and iPad, a photo you already saved can be reverted in Photos — steps on the Export page.
What order should I edit in?
Light first, then color, then composition, then finishing. Fix exposure and contrast before you touch color, because changing brightness changes how every color reads. Crop late — it's a compositional decision, not a corrective one.
How do I know if I've overdone it?
Tap and hold the photo to flash the original. If the edited version looks obviously processed next to it, ease back. Judging on a consistent screen brightness matters too — editing in bright sunlight makes your display auto-brighten and distorts your sense of exposure.
Should I use a preset or edit manually?
Both, in that order. A preset sets a look in one tap and gives you a foundation, then you refine it for the specific photo. Because presets are fully transparent, applying one and inspecting the tools behind it is also one of the fastest ways to learn how a look is built.
Do I need Darkroom+ to follow this guide?
No — the core adjustments, cropping, and saving are all free. Premium tools are marked, and you can always open them and see what they do to your photo; a membership is only required to export a photo that uses one.
Related
- Interface Overview — the Library, the Viewer, and Export
- Adjustment Sliders — every control in depth
- Create a Vintage Film Look — a complete worked look
- How to Edit RAW Photos — when you're ready for more latitude